Printing in Arda
Last updated: January 22, 2026
Print Individual And Bulk Cards Labels Breadcrumbs Efficiently
1. Identify Item To Print
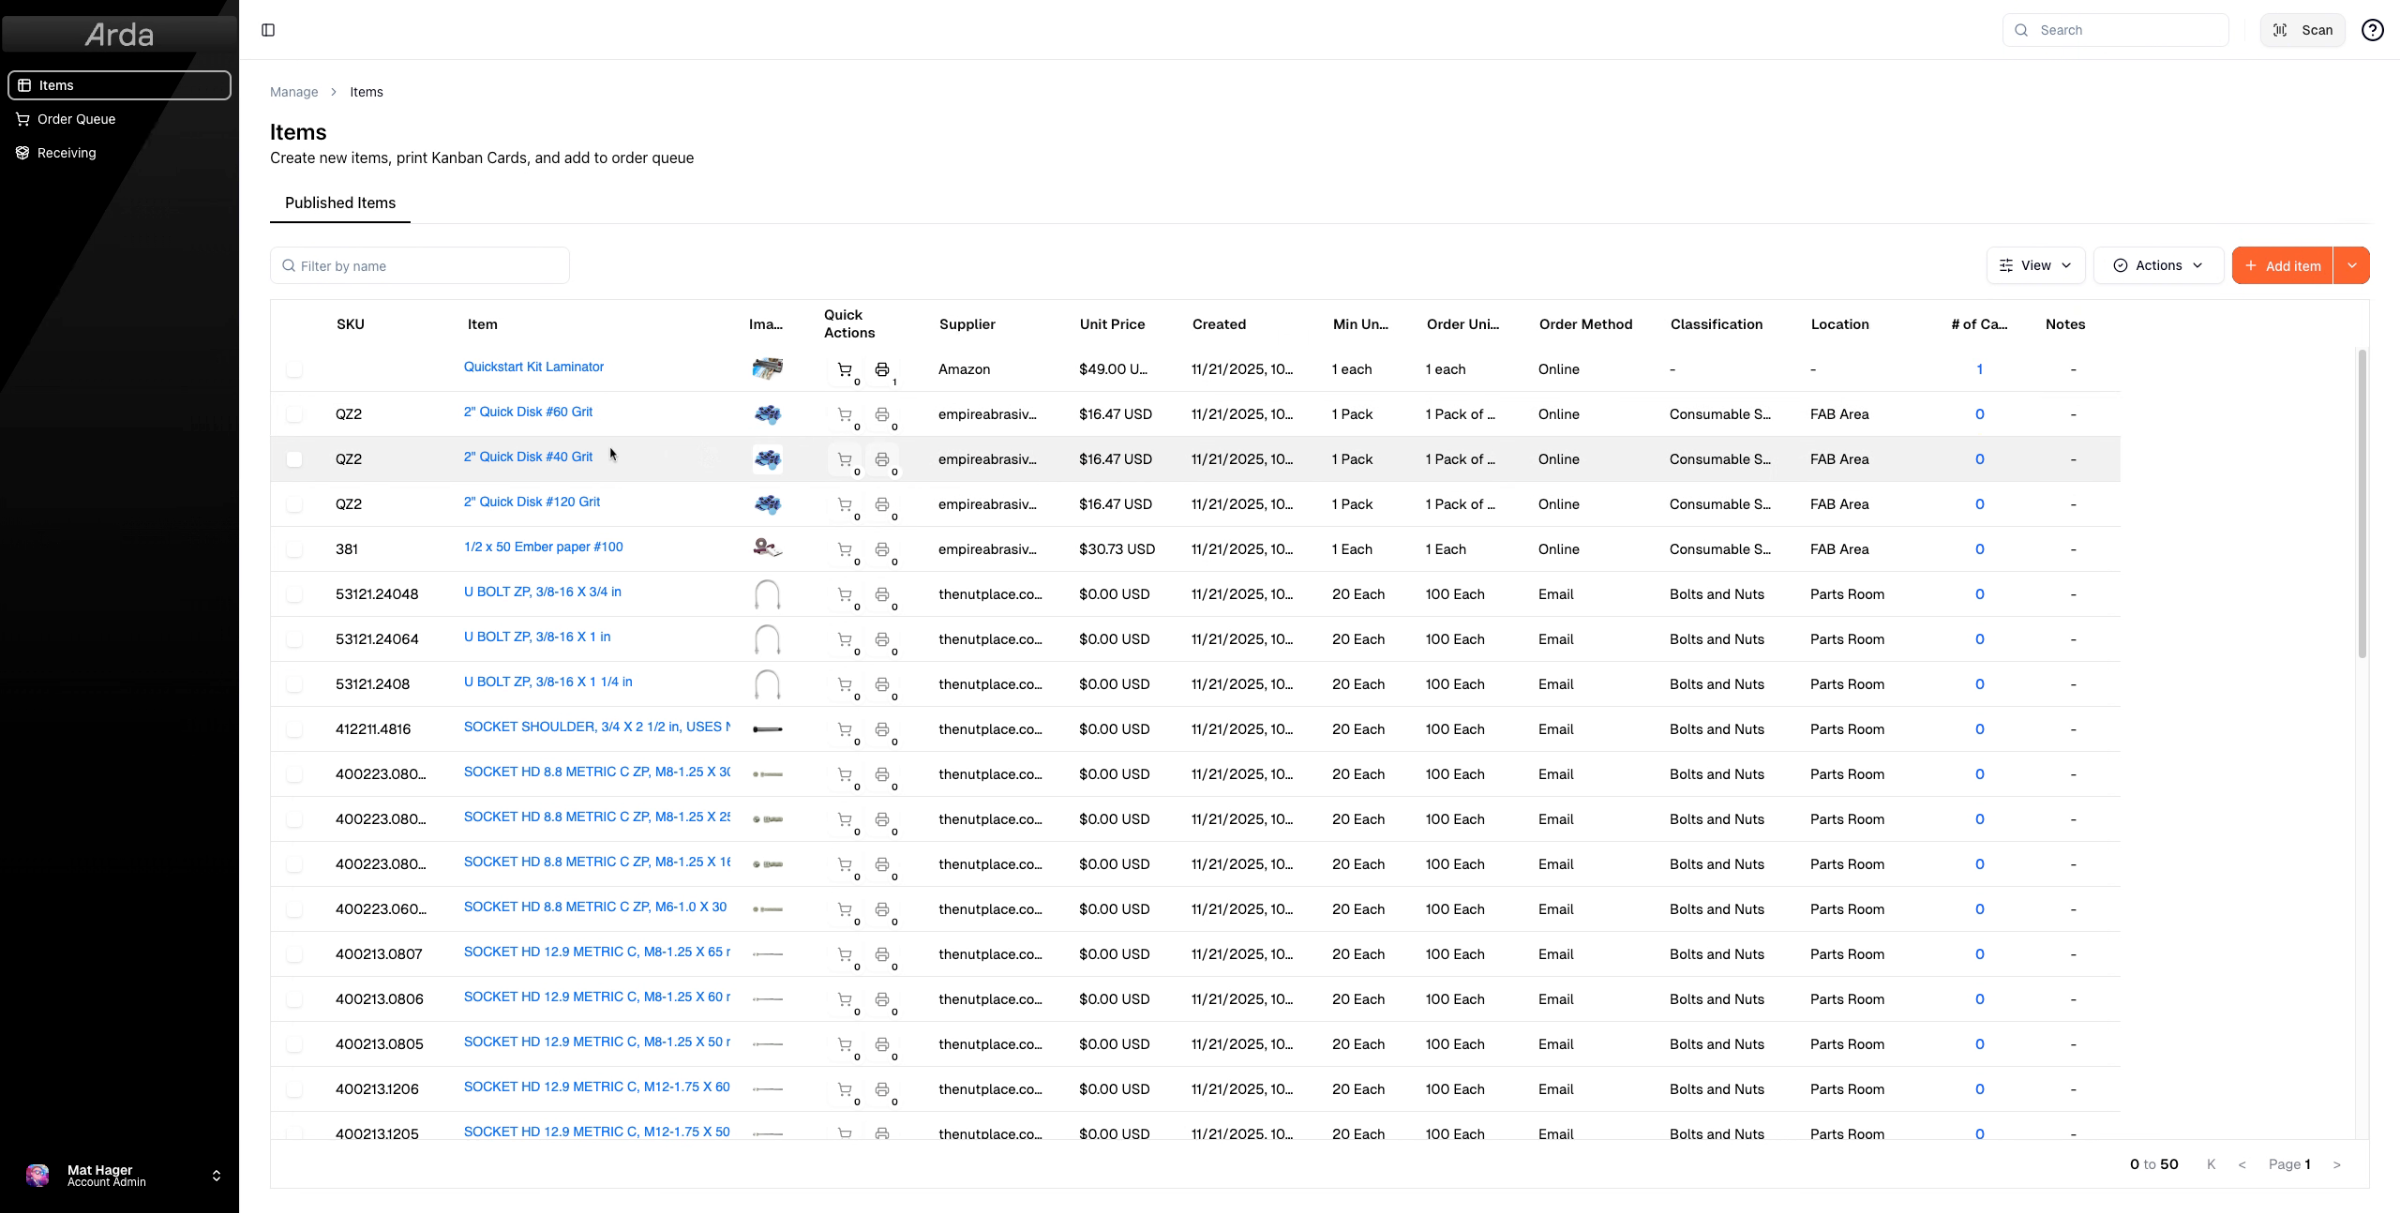
First, let's go in and take a look at an item that needs to be printed.
2. Verify Card Creation Before Printing
One of the things you need to make sure you have before printing is that a card is created. If one card isn't created, you'll see the notification seen here. Since we don't have a card for this item, we're going to go ahead and create our first card.
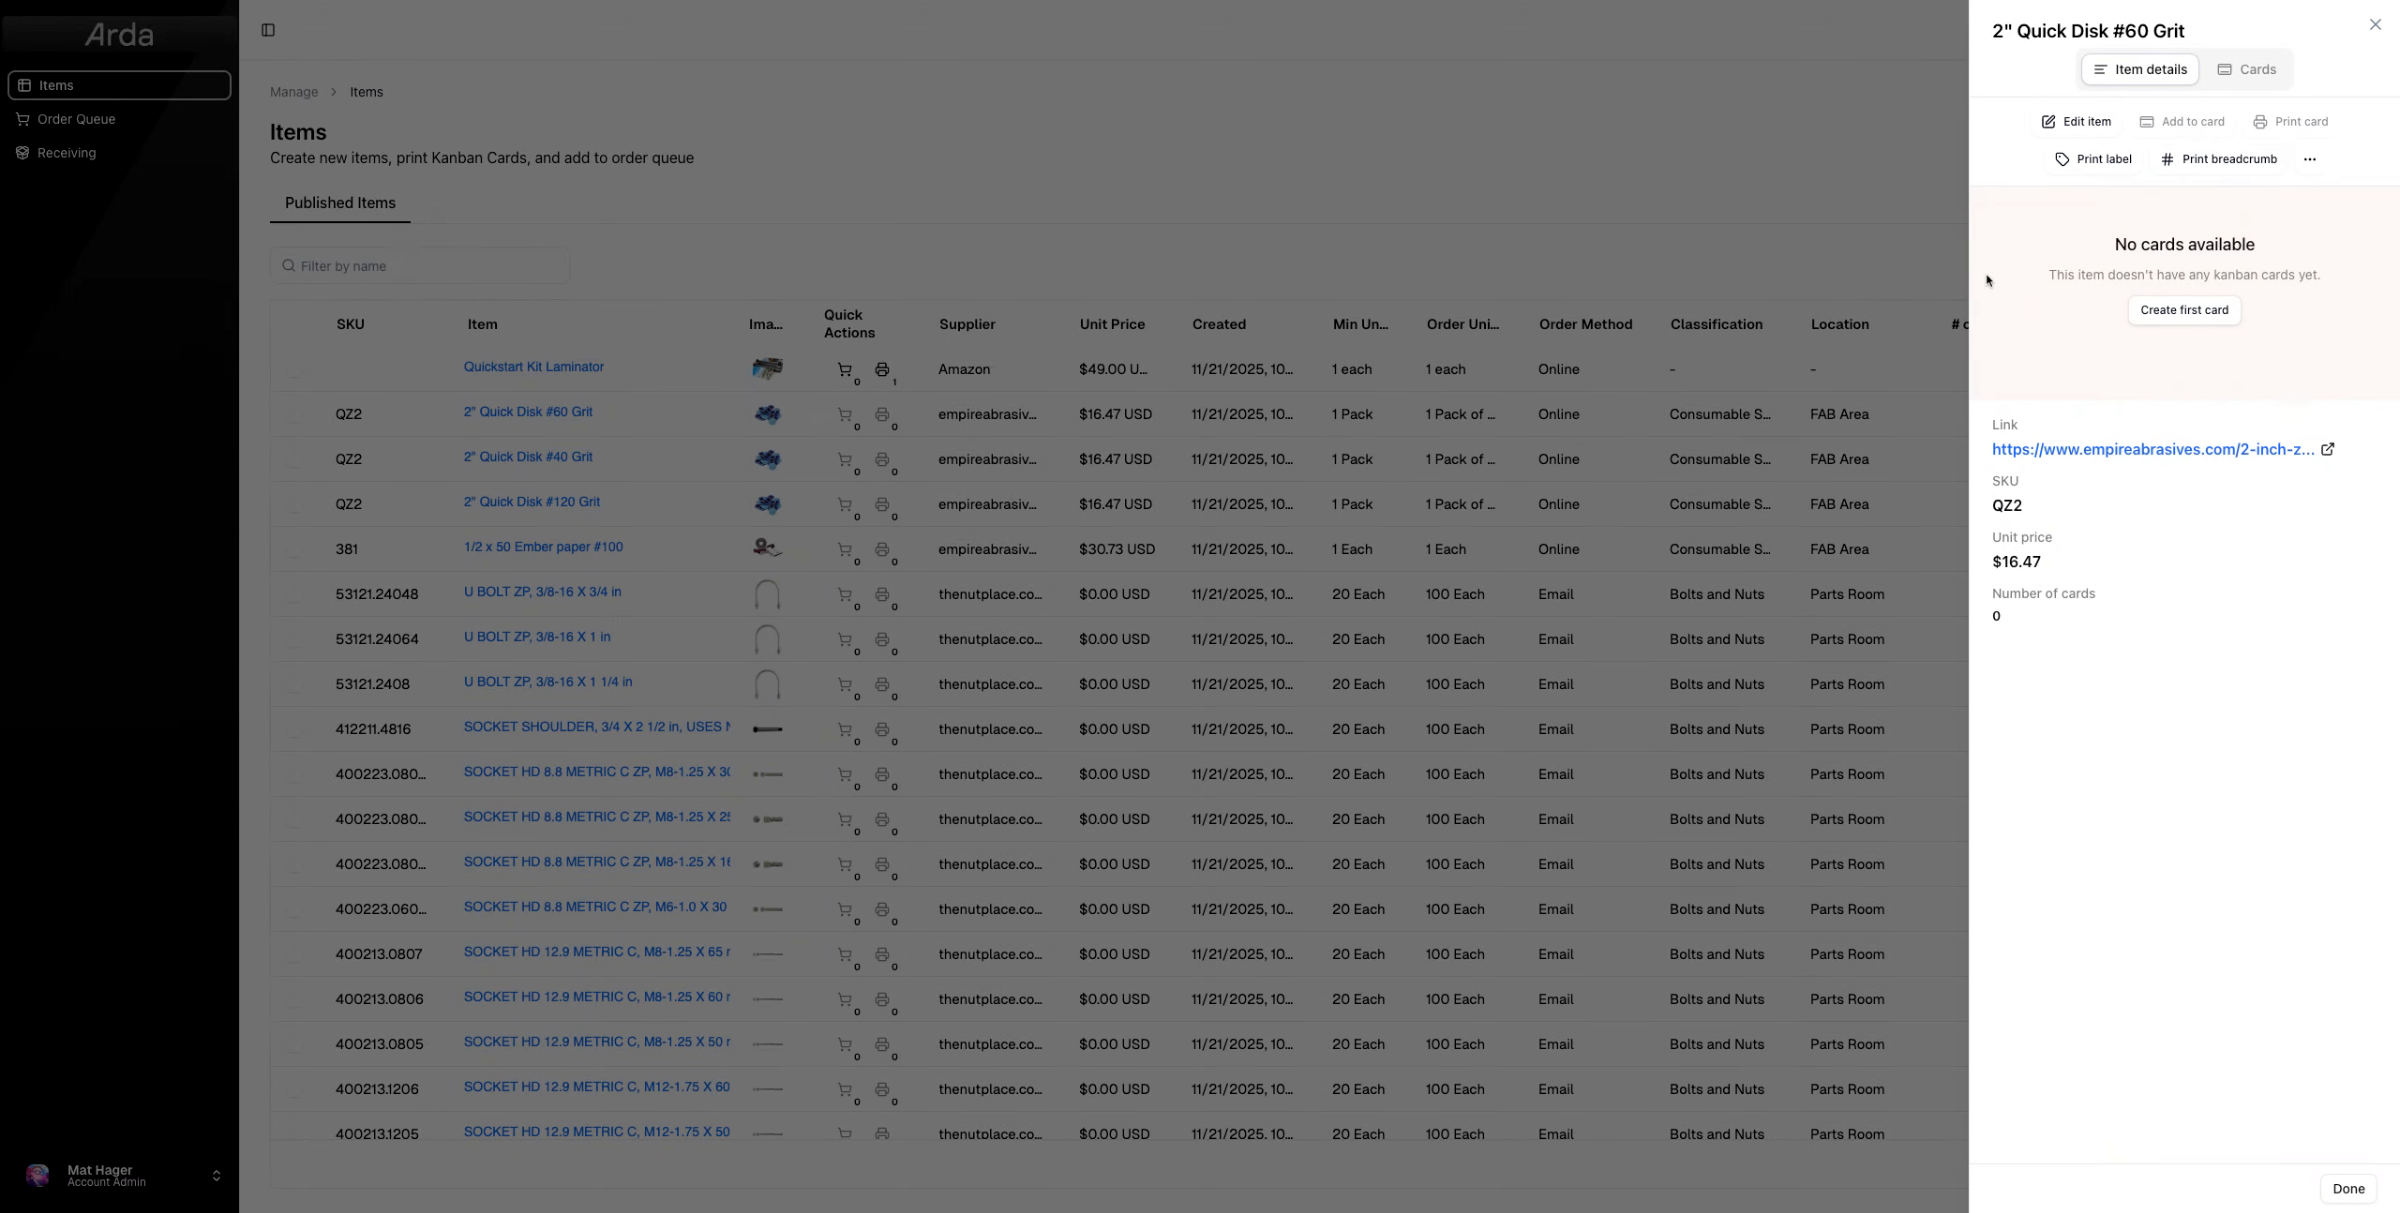
3. Verify Card Creation Before Printing
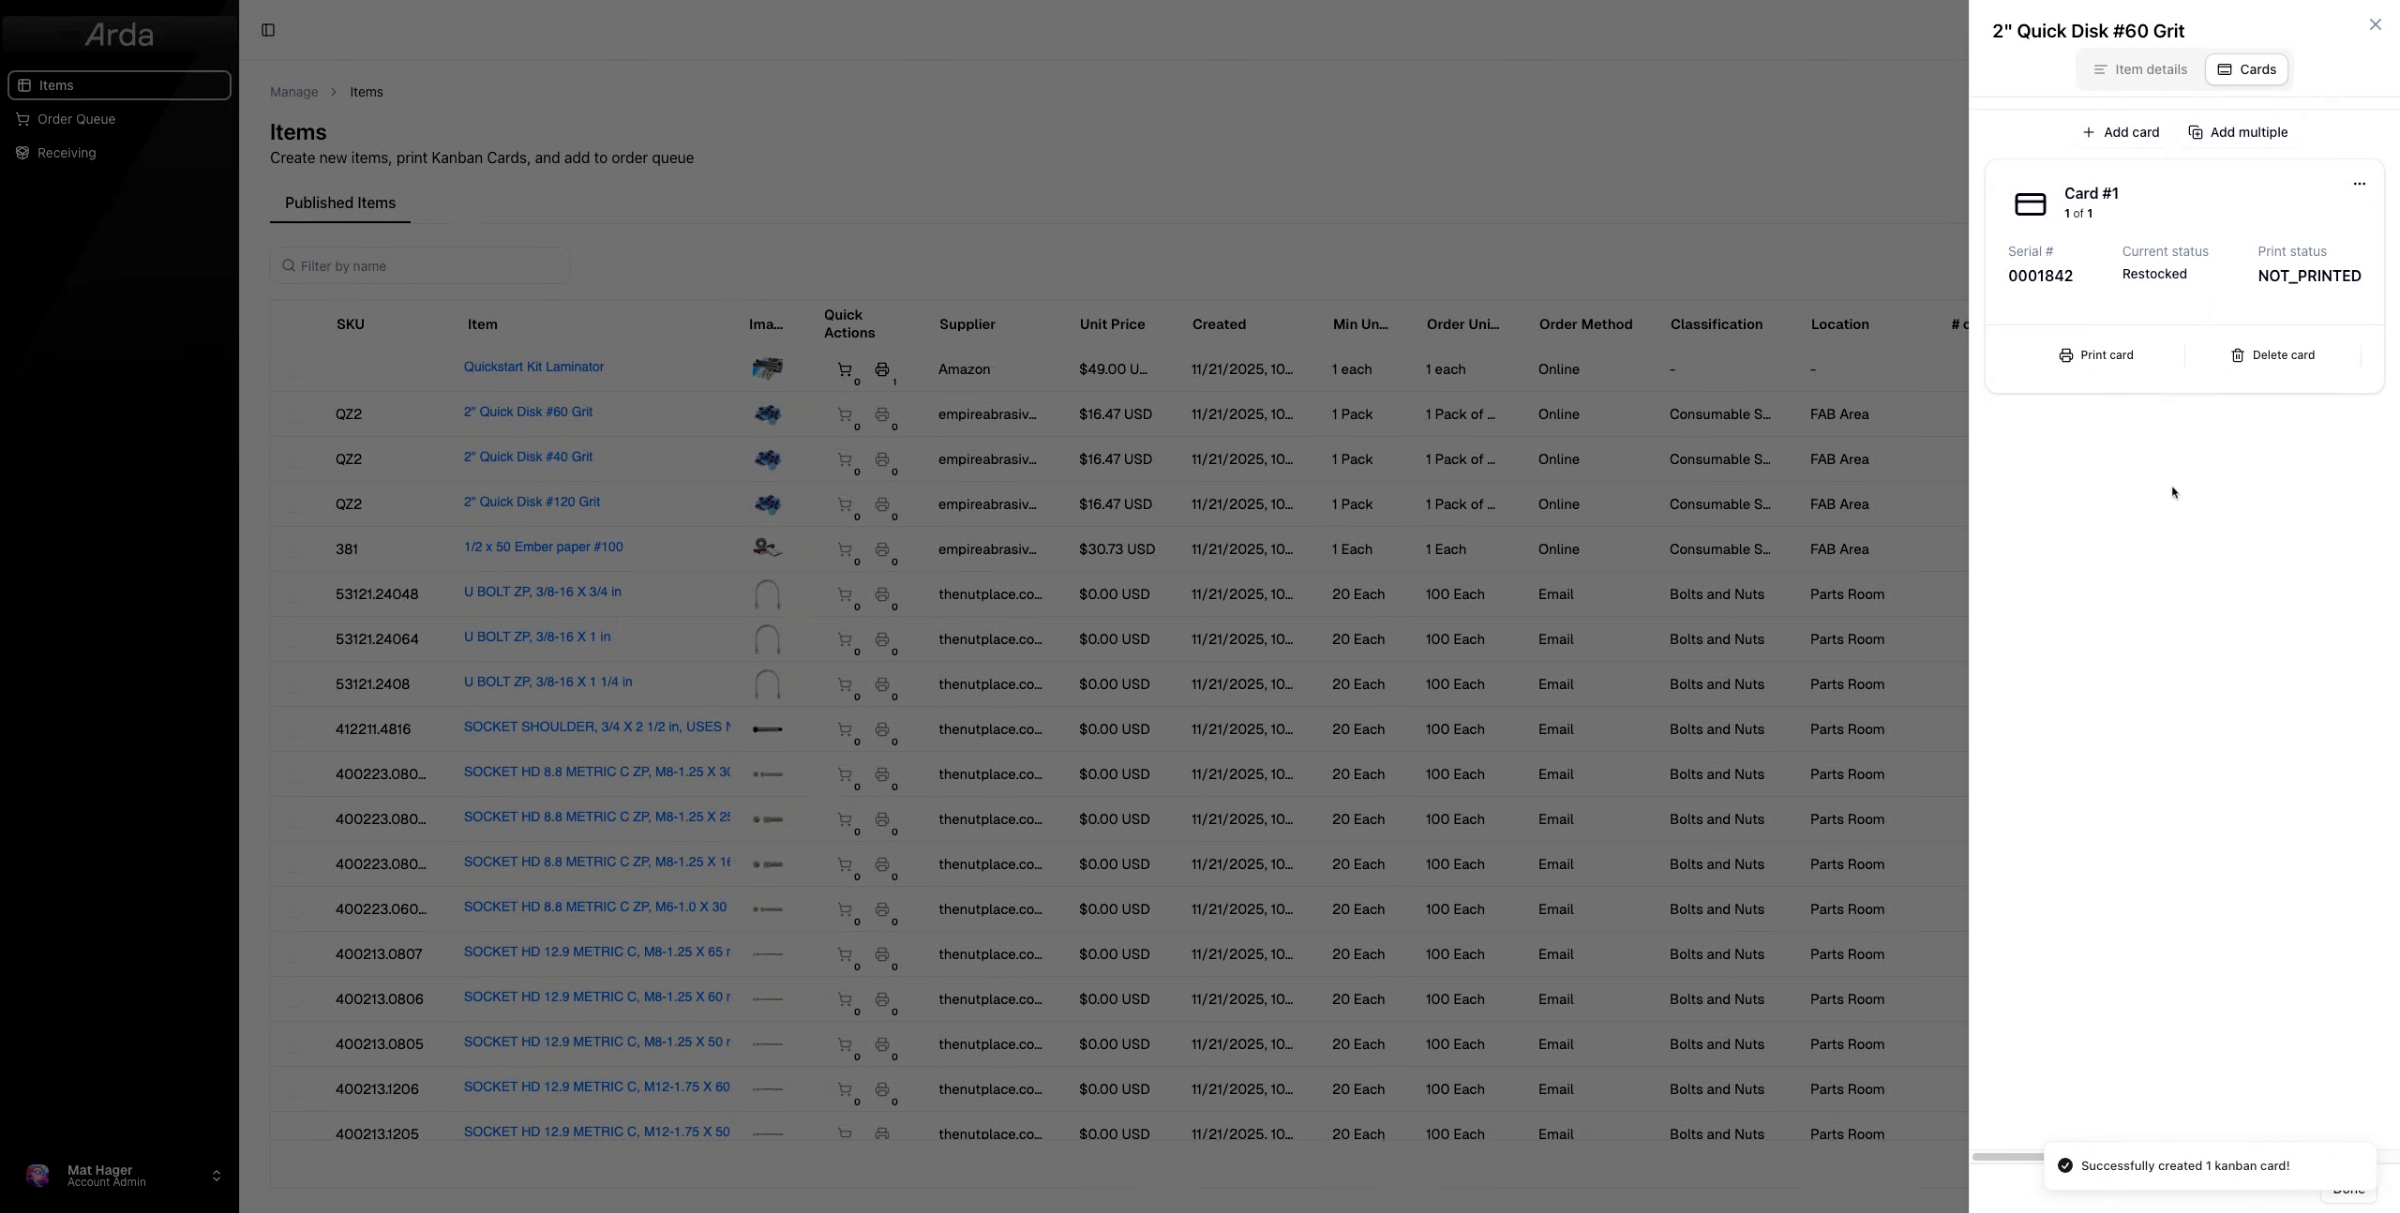
4. Confirm Card Availability at a Glance
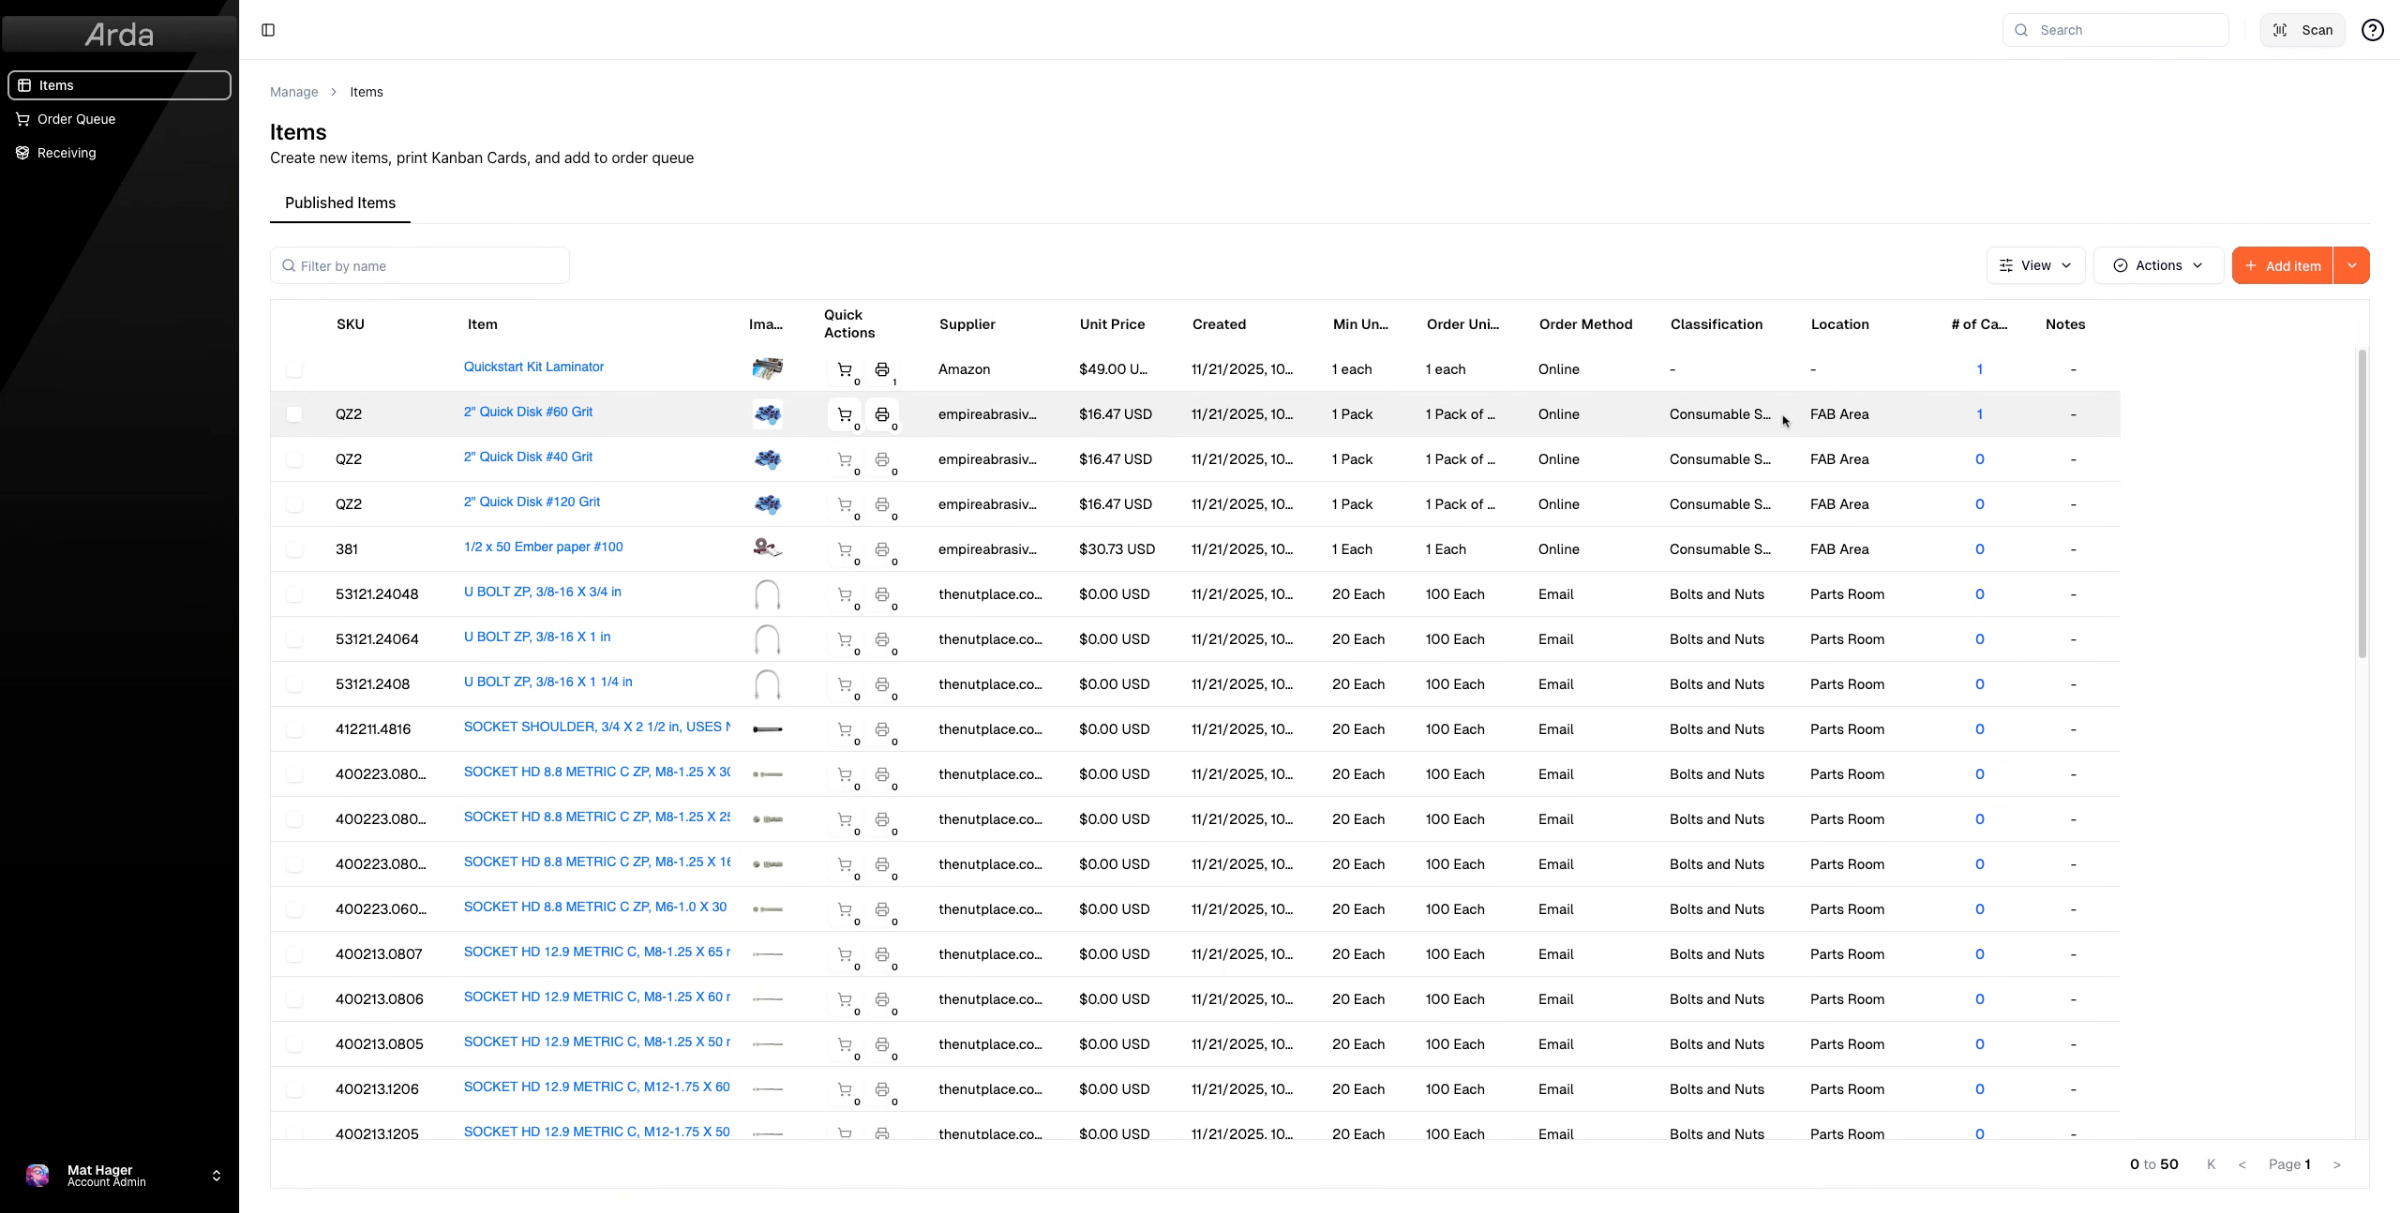
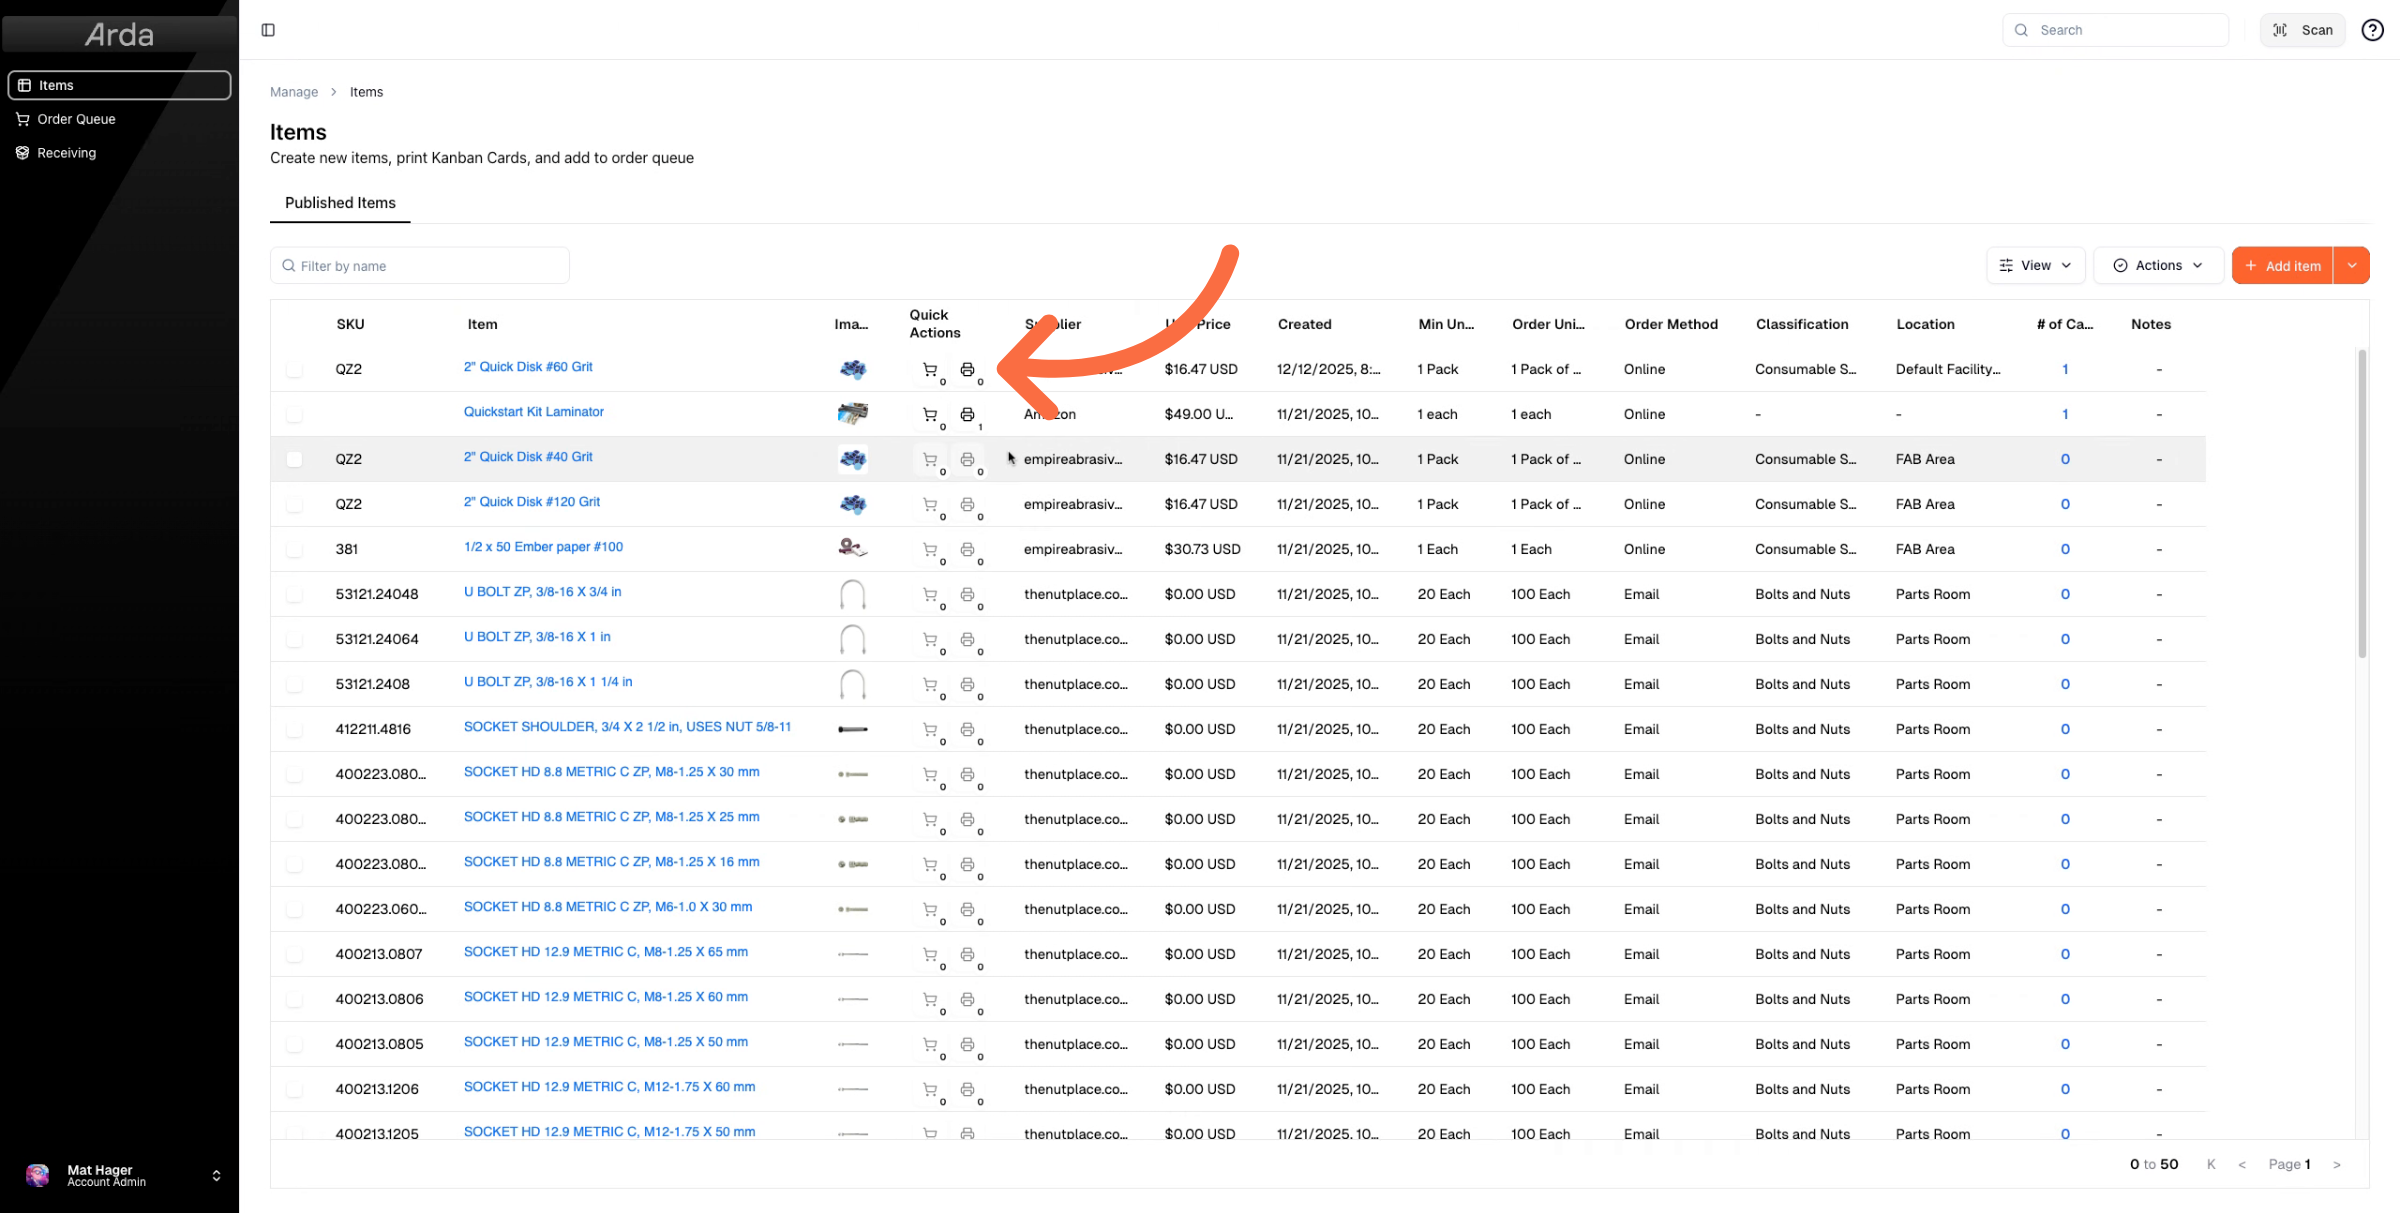
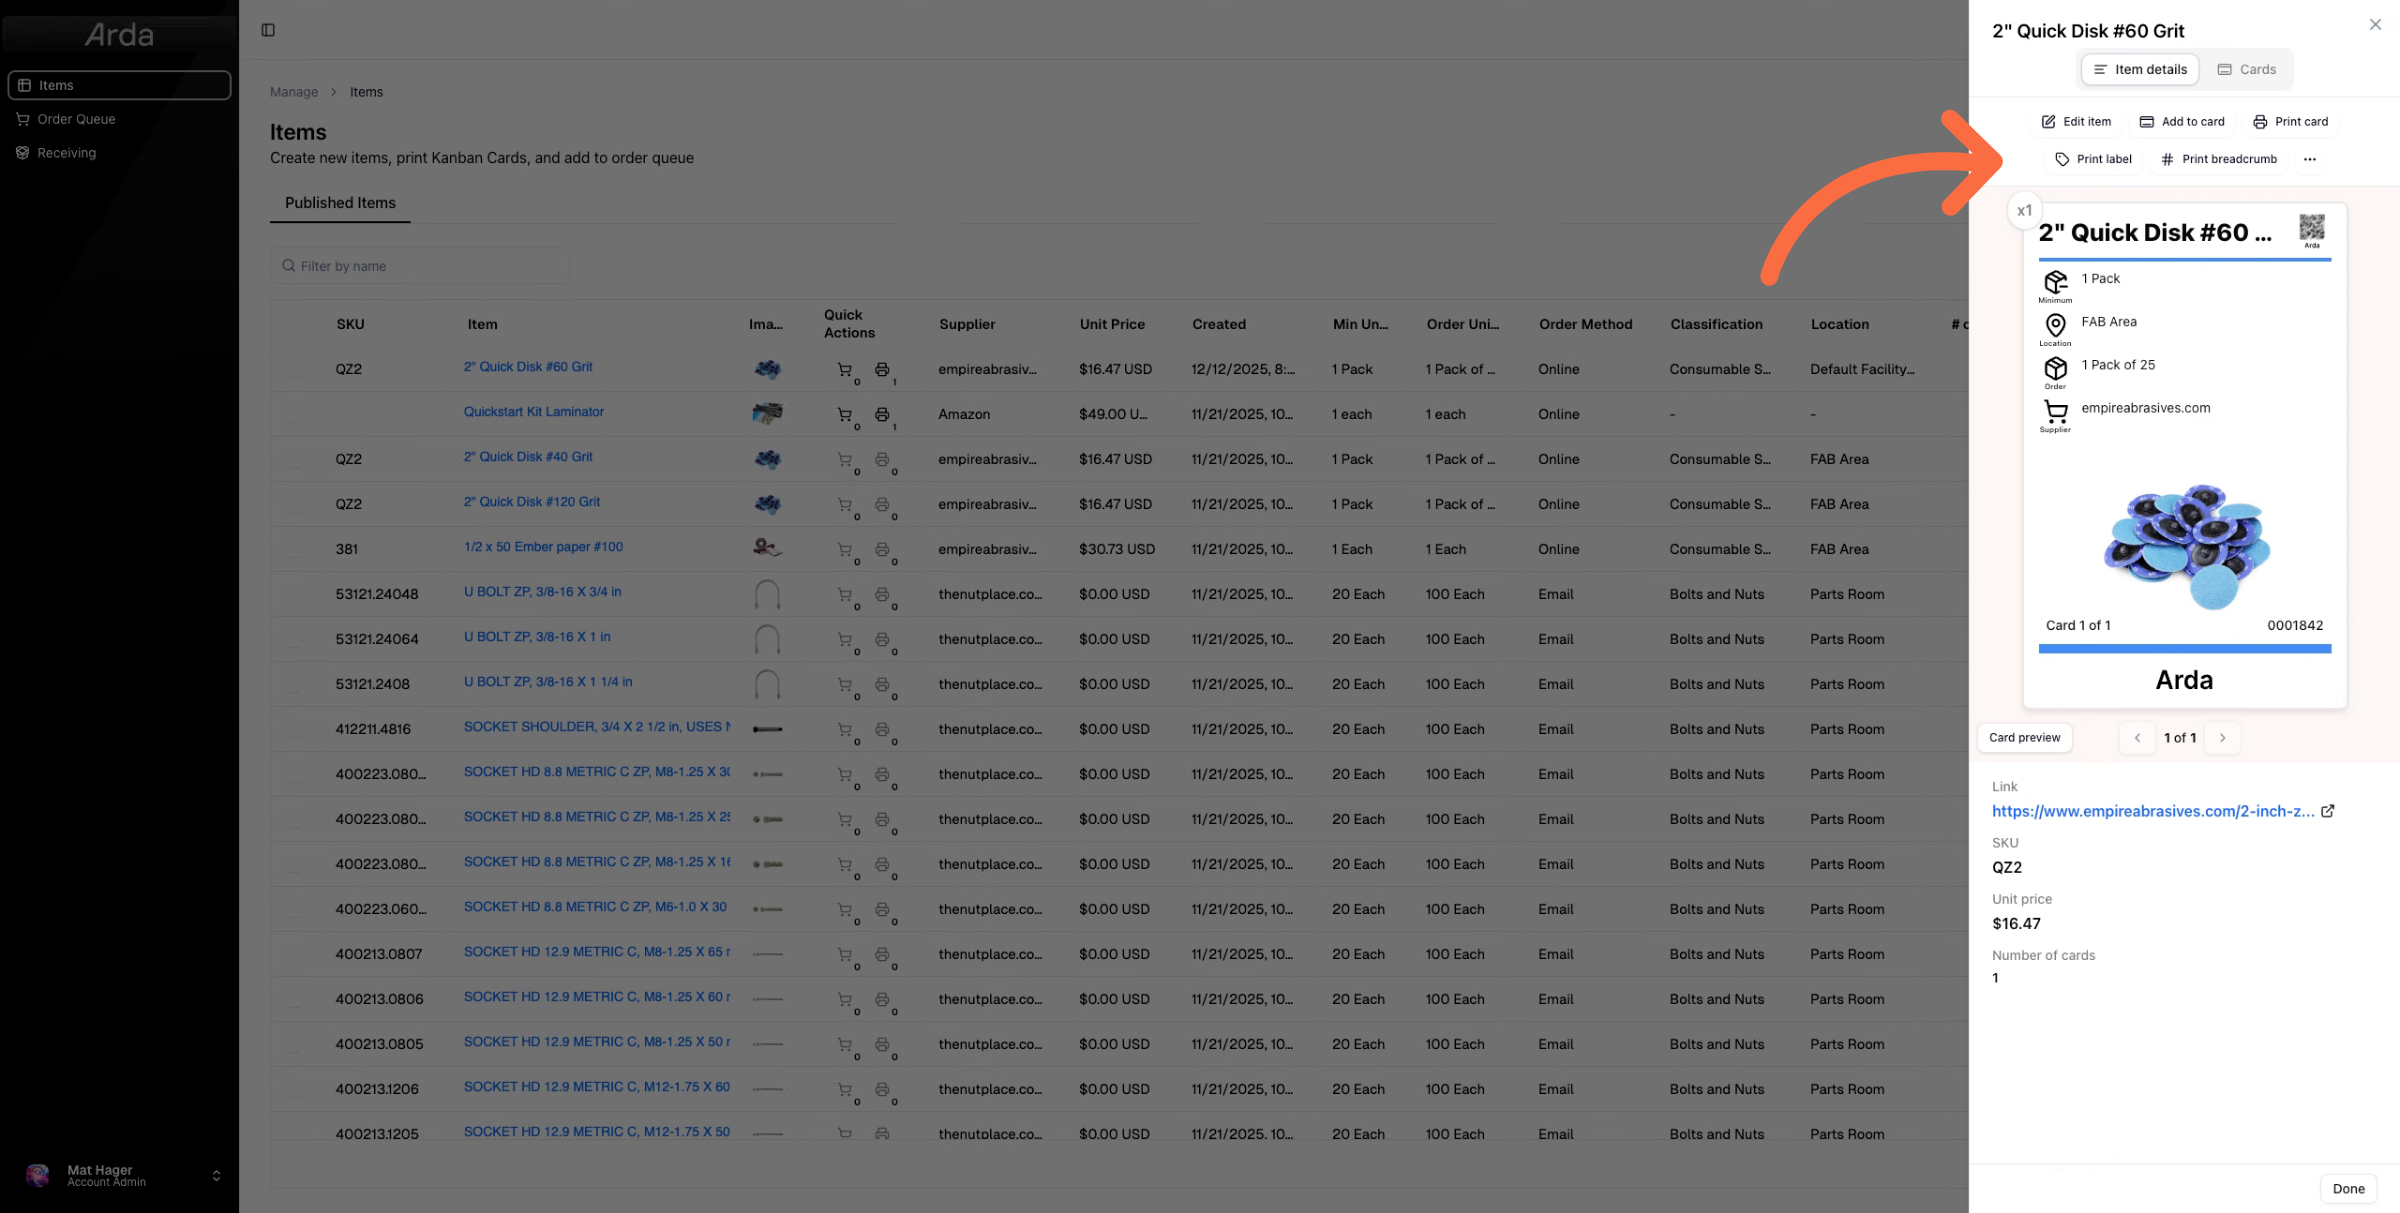
We now have a card and we can go ahead and print. Before going to that, let me show you how to see if your item has a card at a glance by checking the number of cards column for a value of one or greater.

5. Return To Item Details
All right. Now that we have that, let's go ahead and hop back into an item by selecting the item.
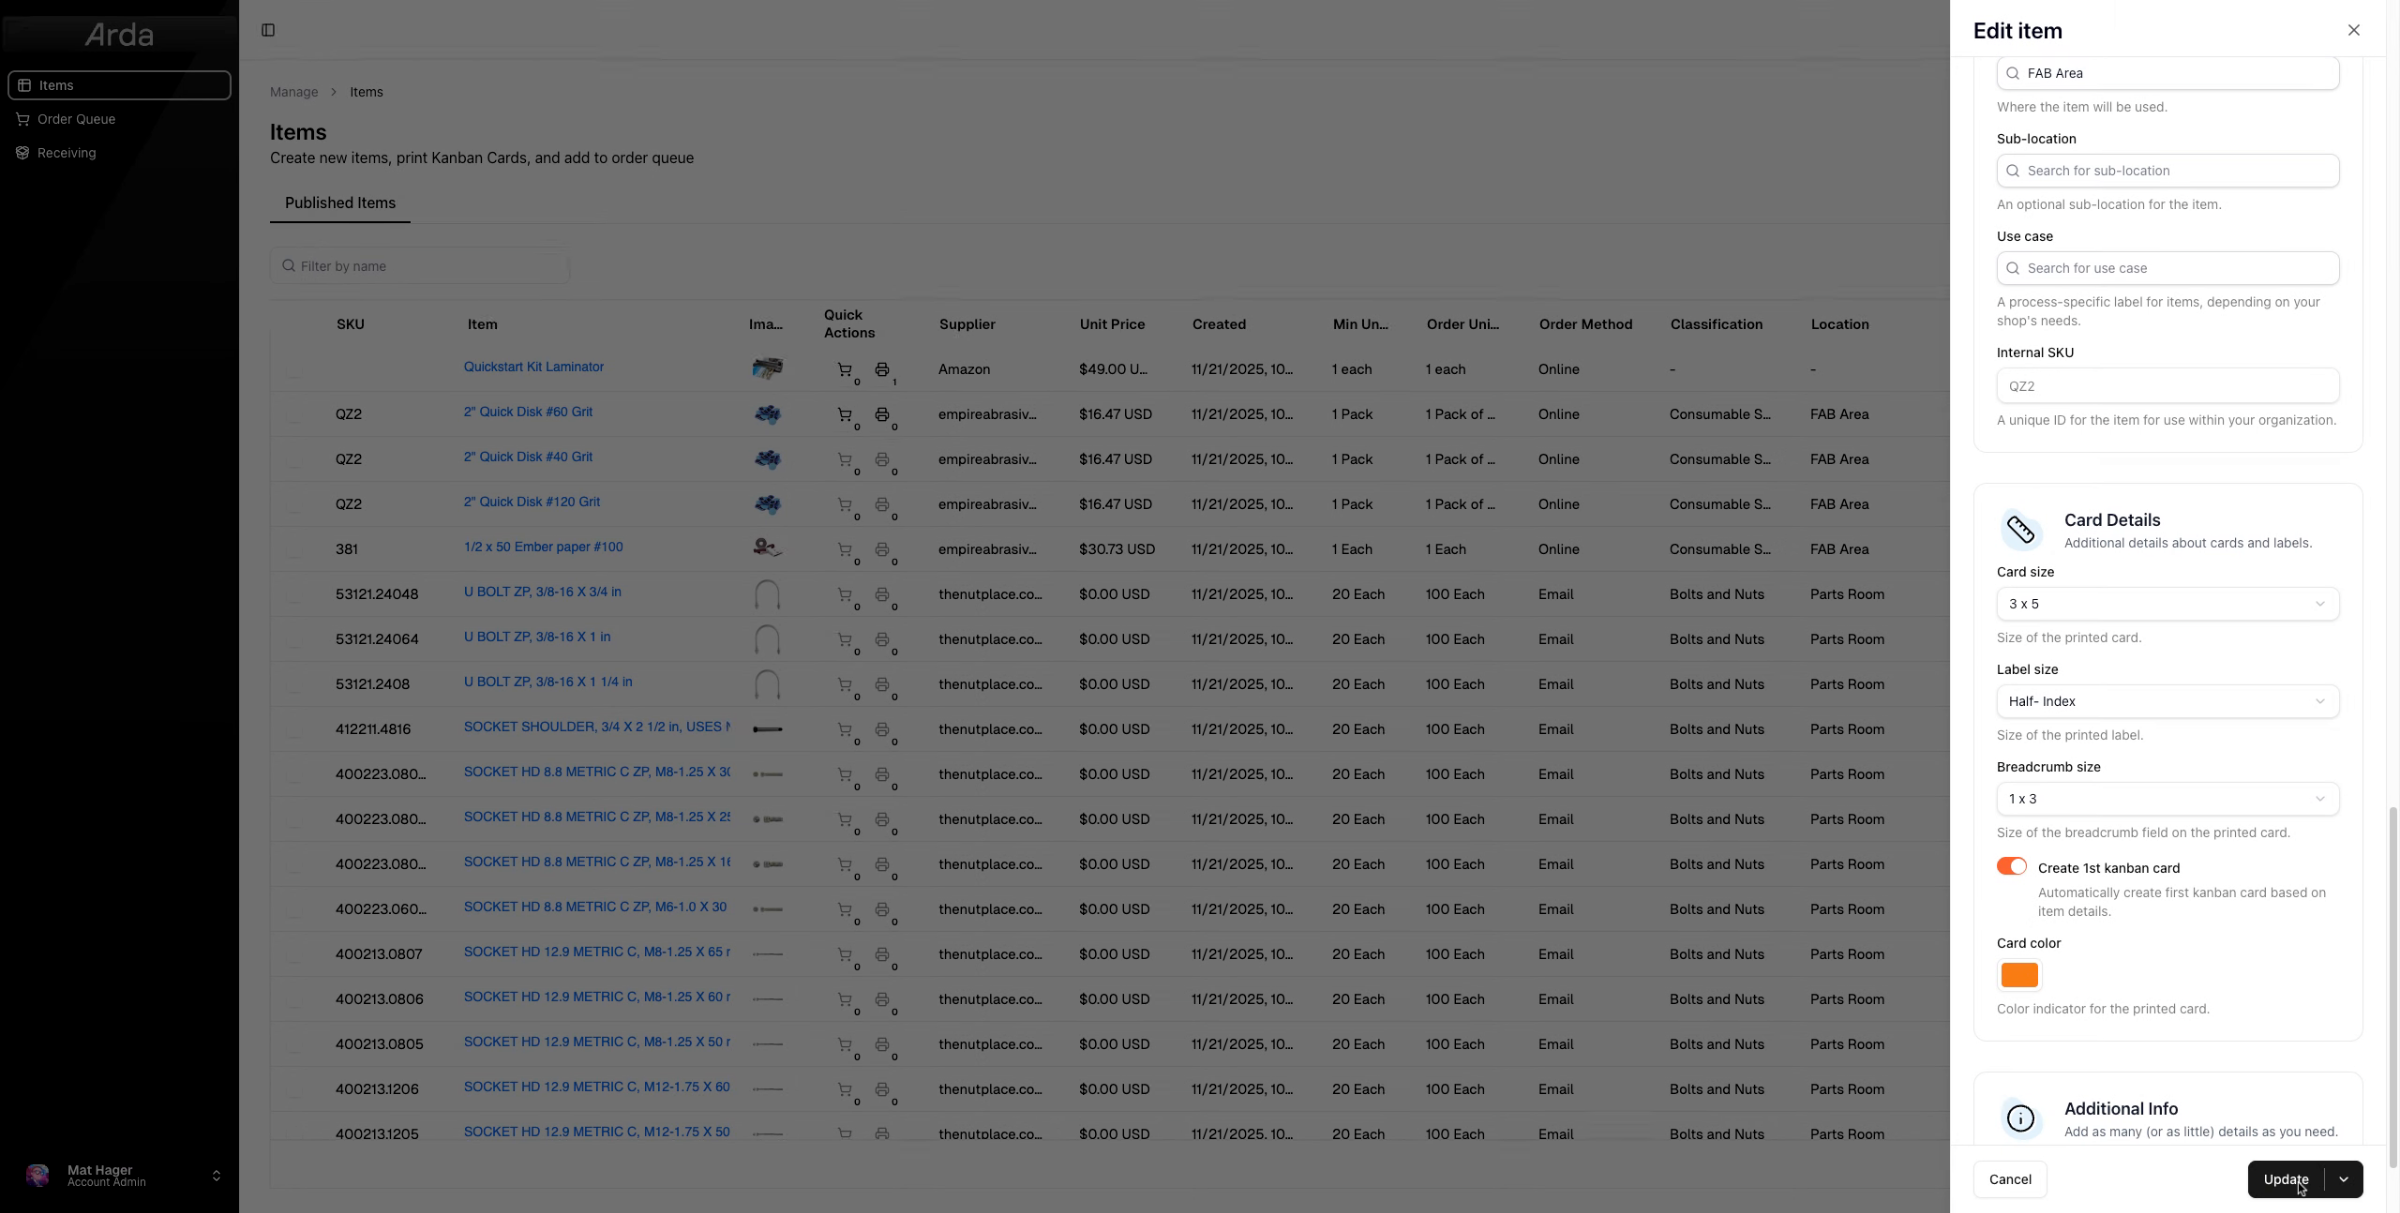
6. Access Item Details Templates
We're going to come over to item details and let's go ahead and take a look at the different templates that we have available to us.
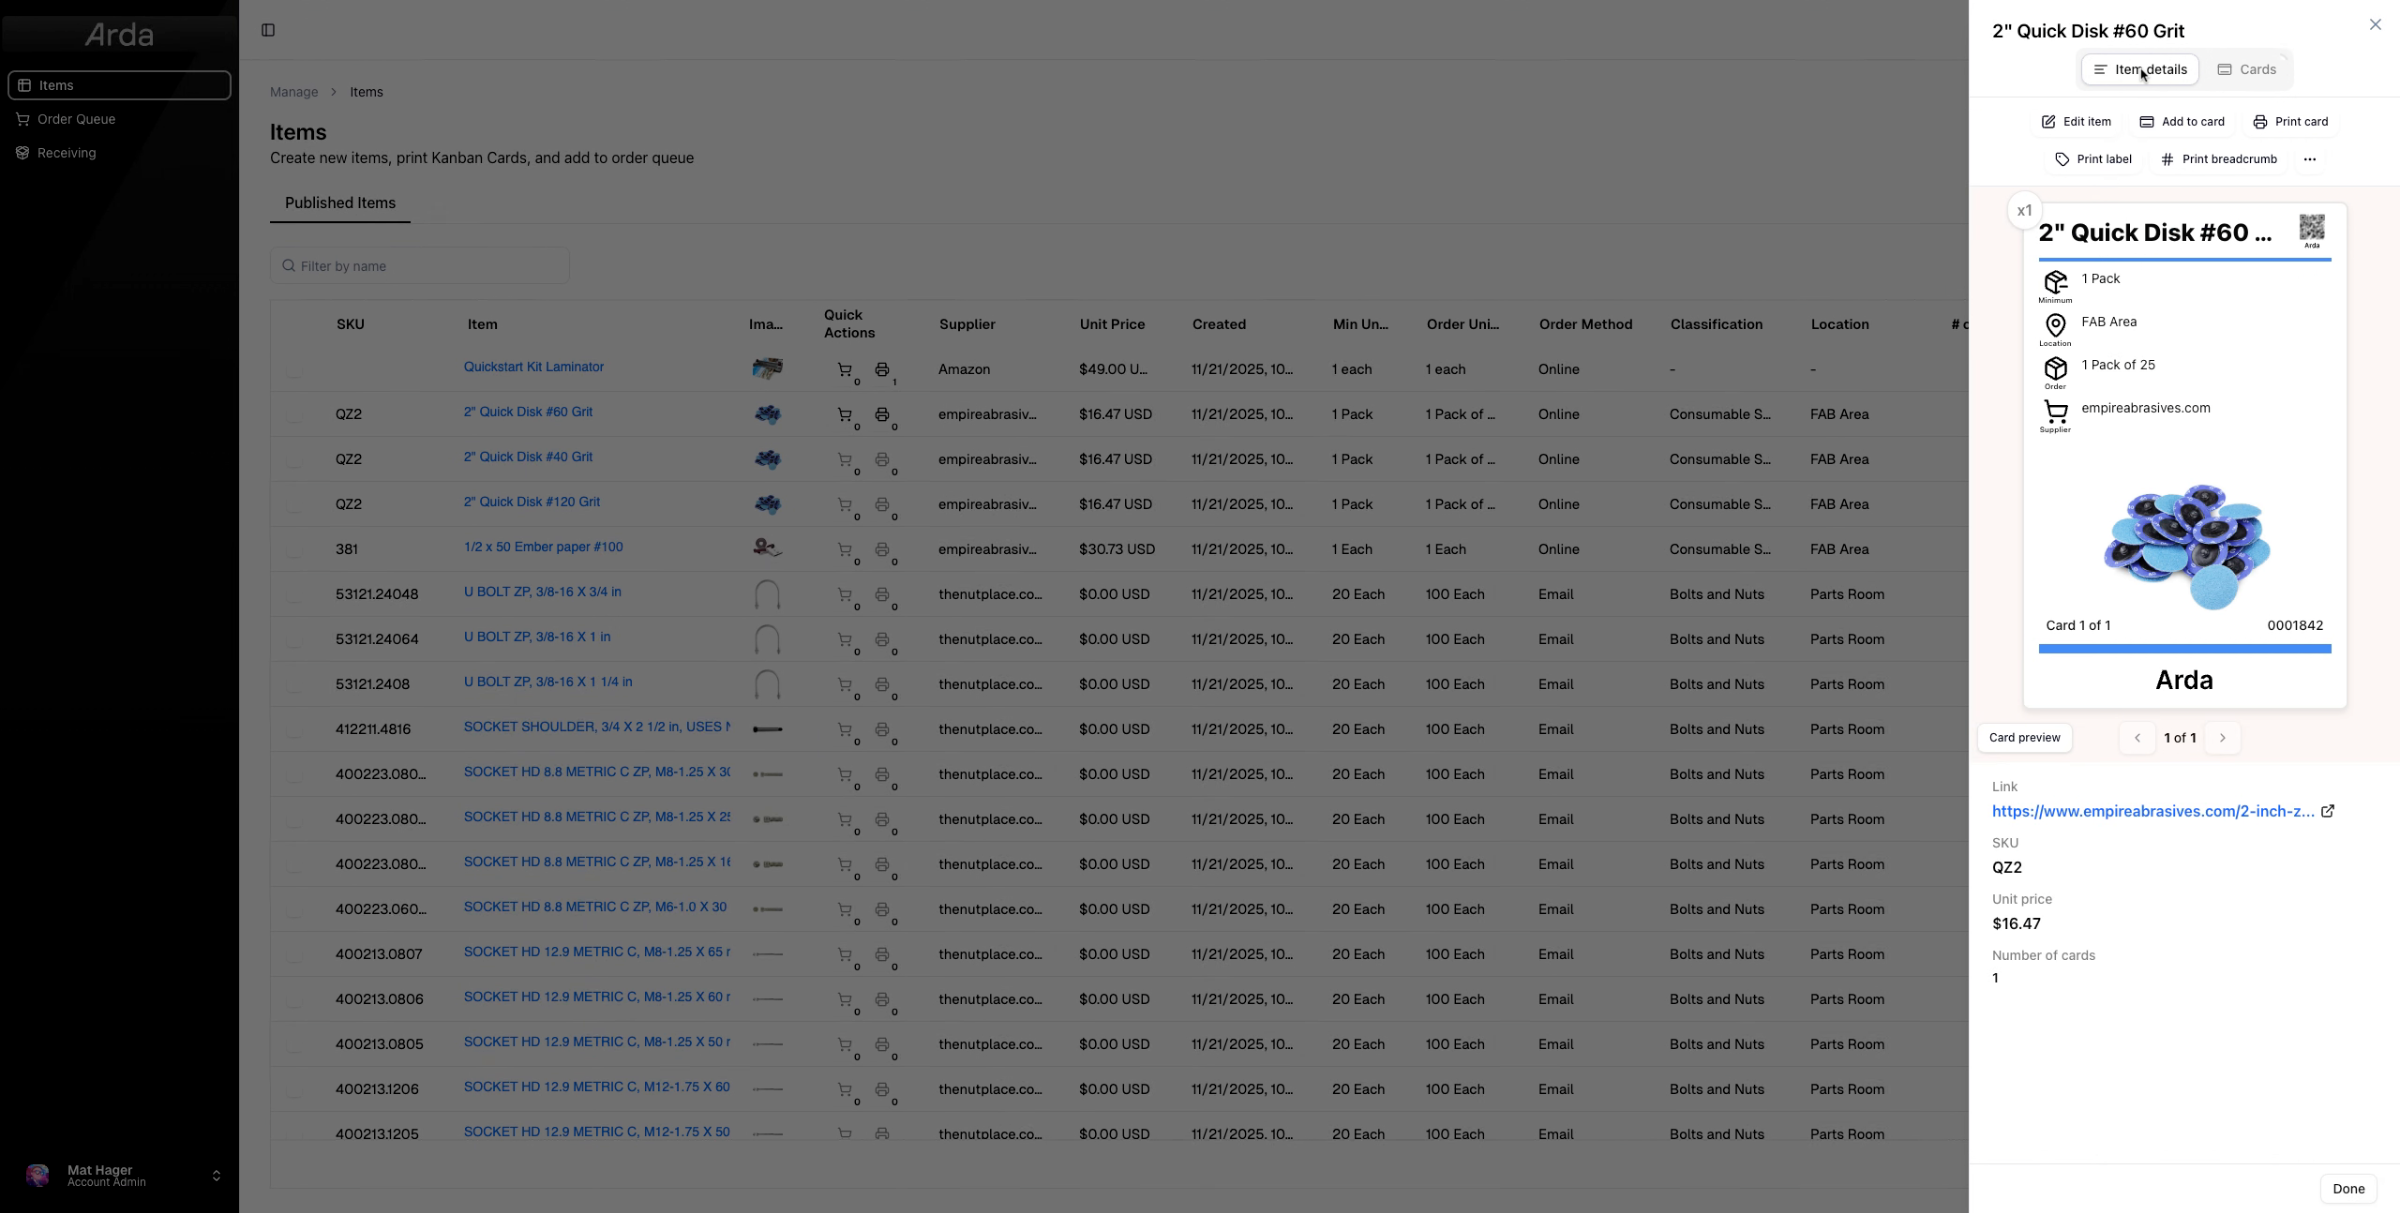
7. Describe Card Templates
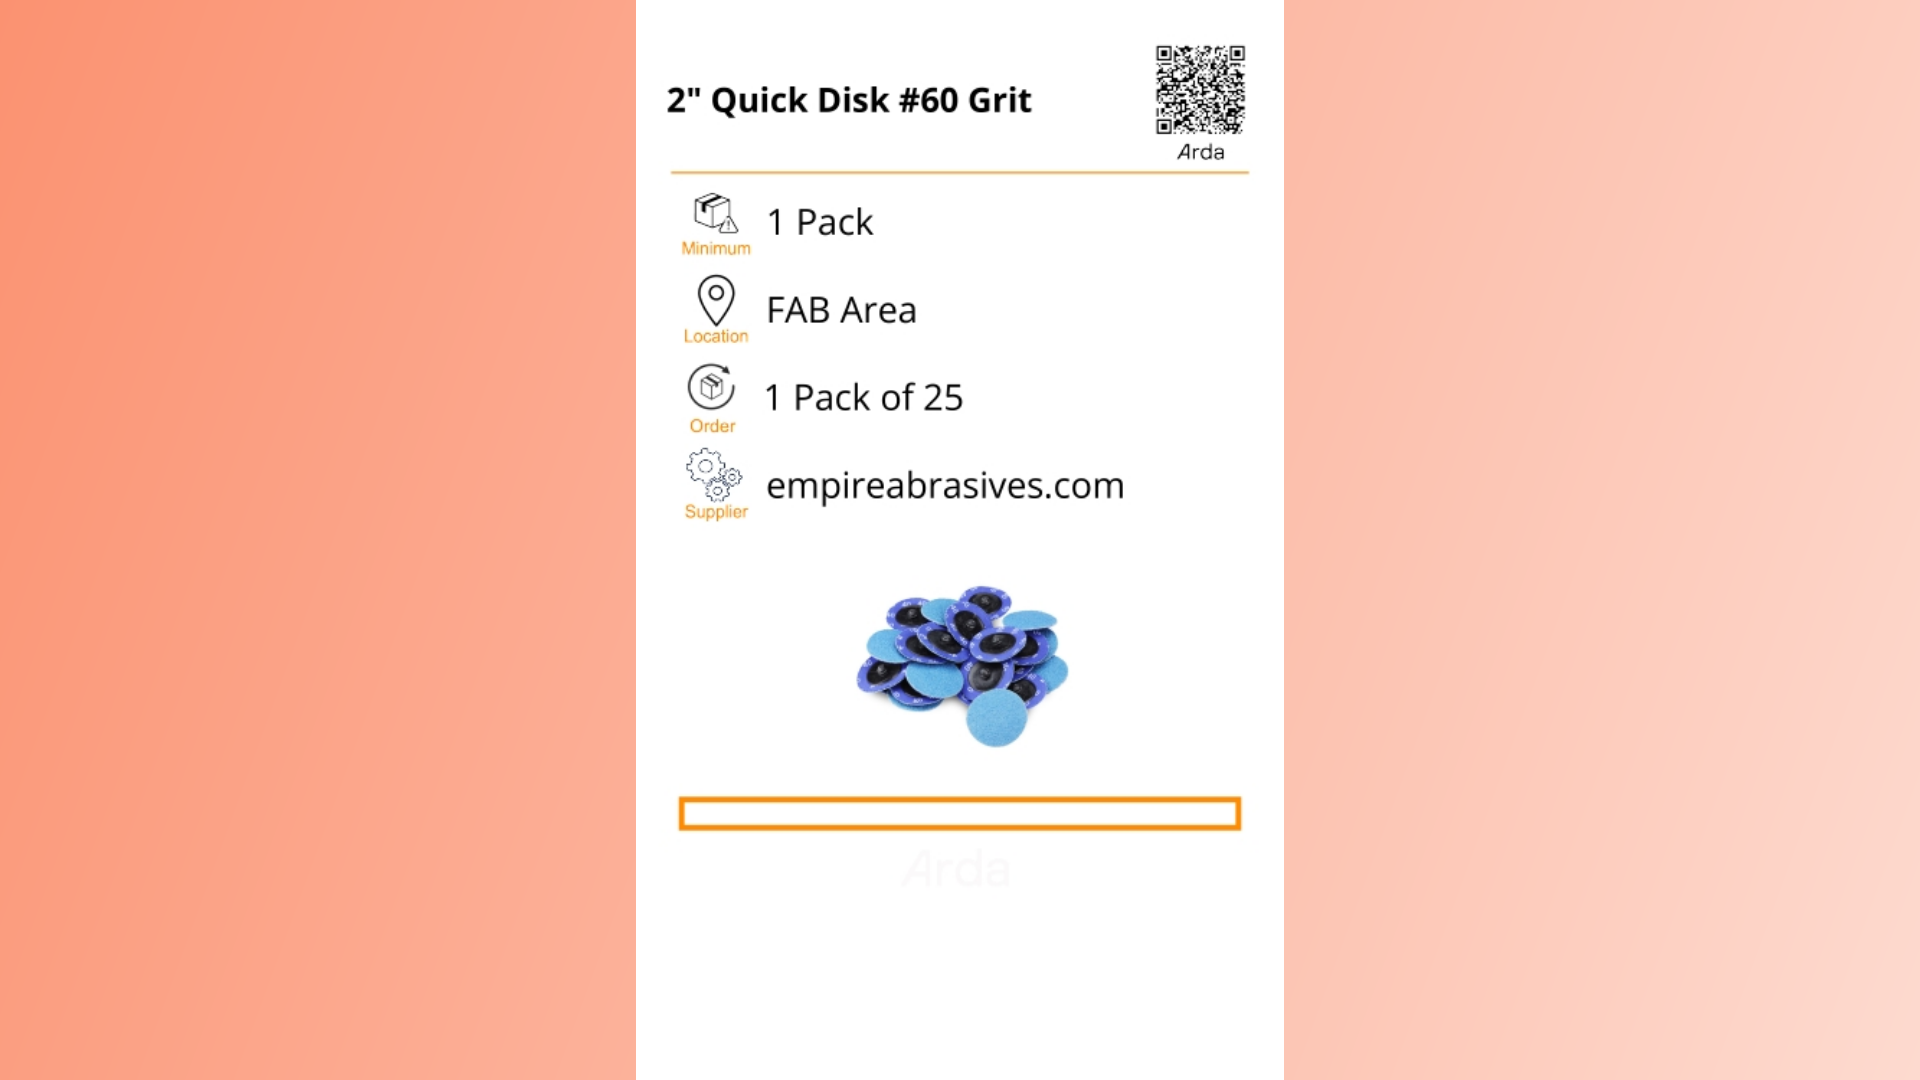
Cards are what move with the product. They are your kanban card, showing minimum quantity, order quantity, and location. Essentially, they travel through the different states of kanban. For more info on this, head to our FAQ section.
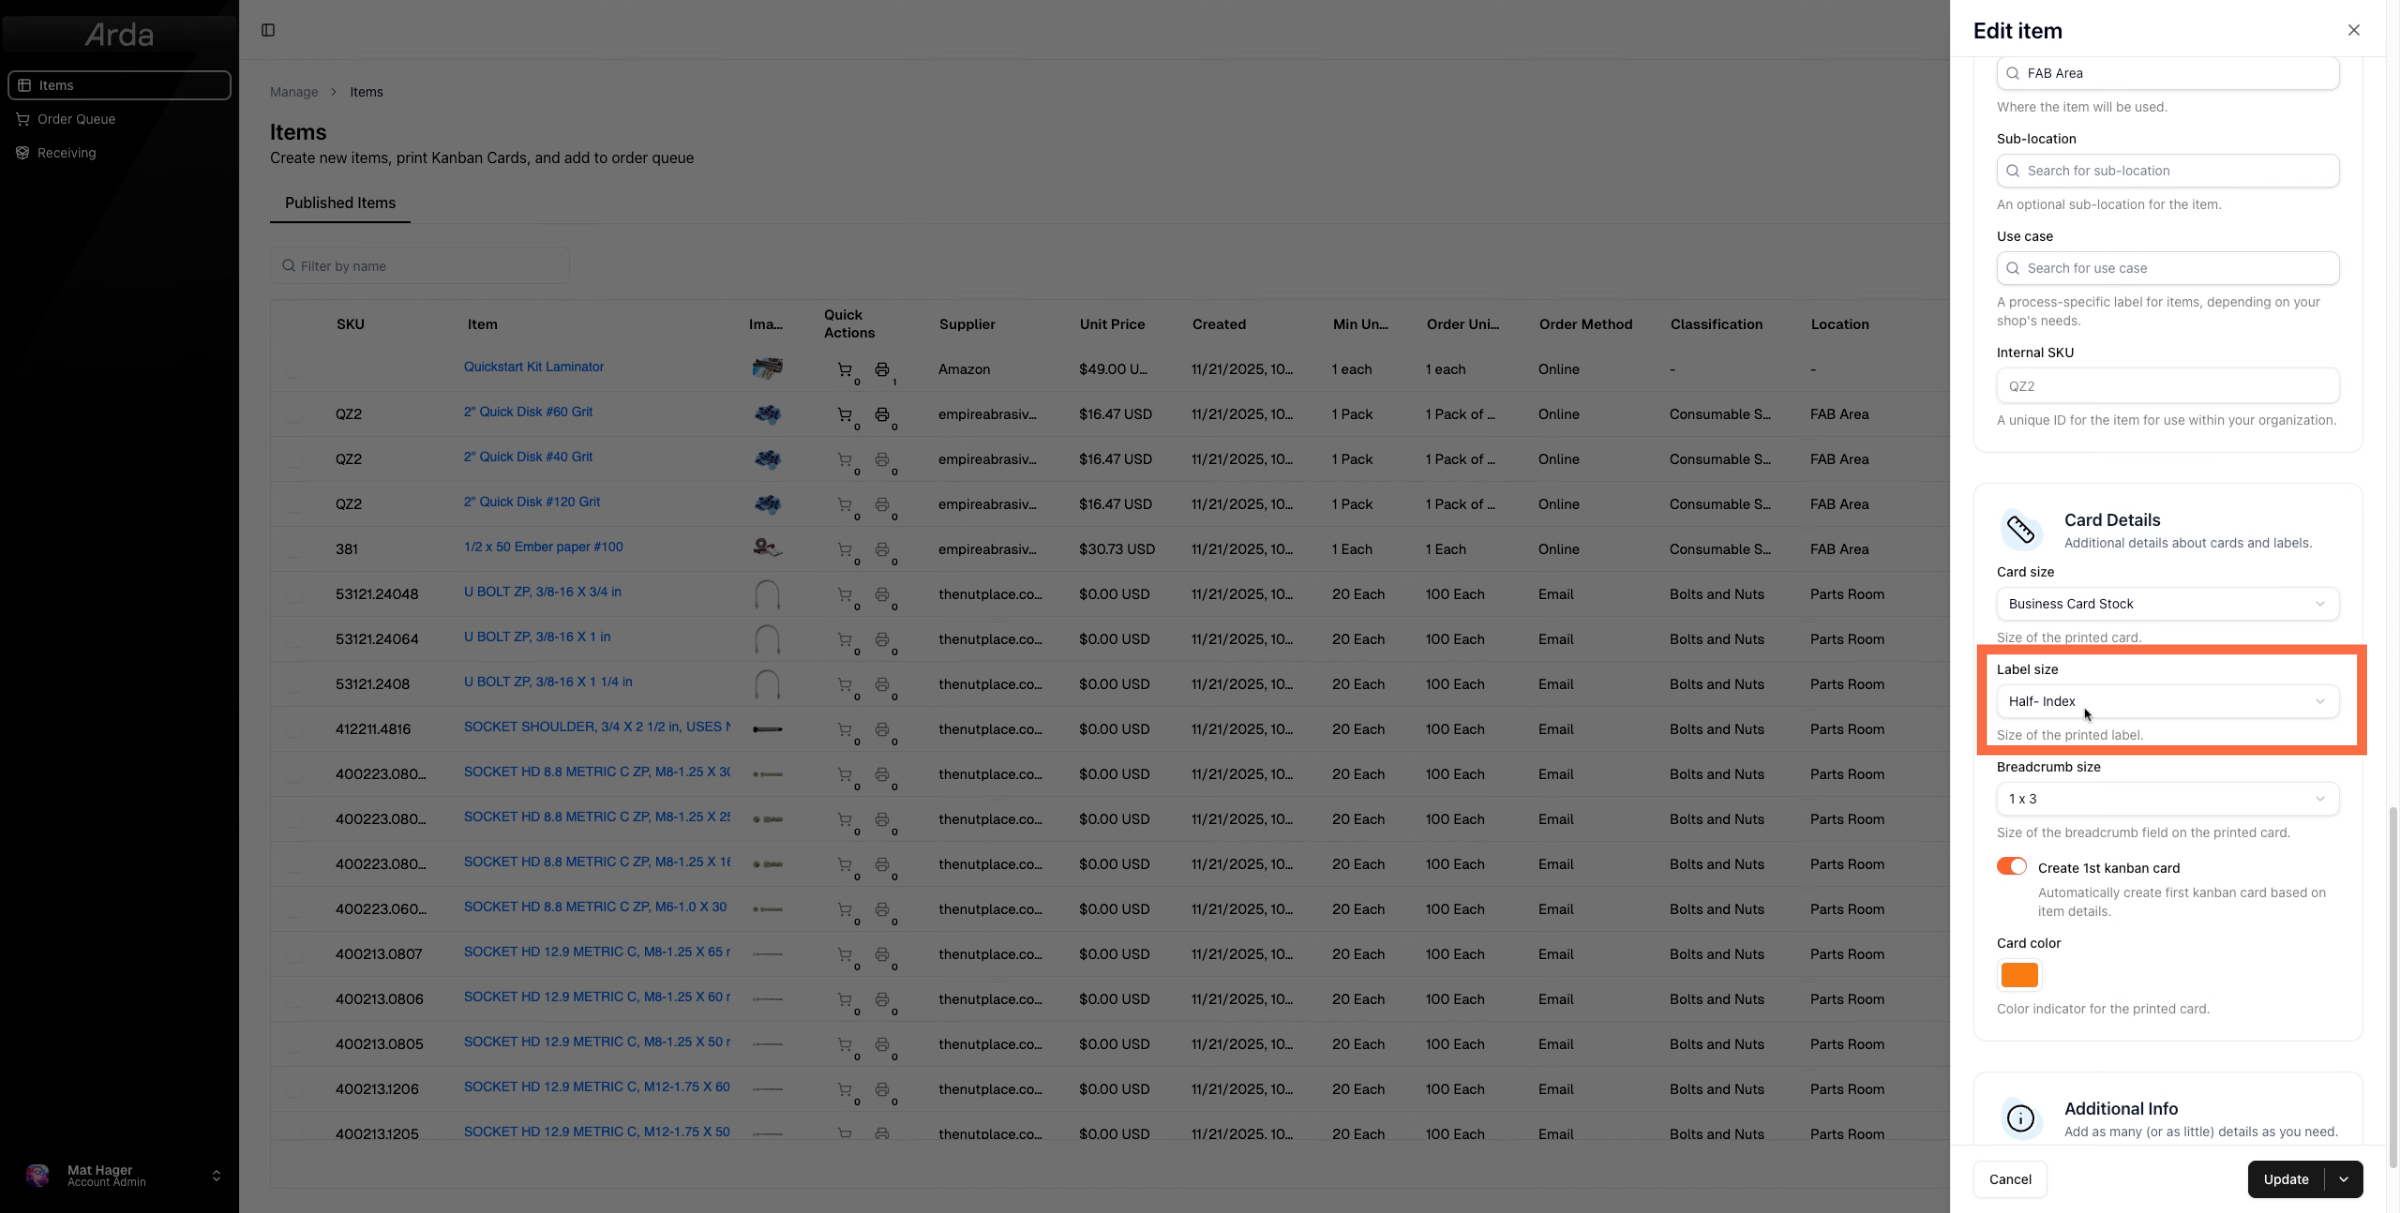
8. Explain Labels
Labels are fixed at the items storage location and aid in locating and reserving space for items
9. Explain Breadcrumbs Purpose
Breadcrumbs are a special type of label that shows where to find more stock. You place a breadcrumb in the bin or work area where the item gets used. When that spot runs out, the breadcrumb tells the person restocking exactly where to go next. The actual inventory kanban and reorder process happens at that source location, not at the point of use.
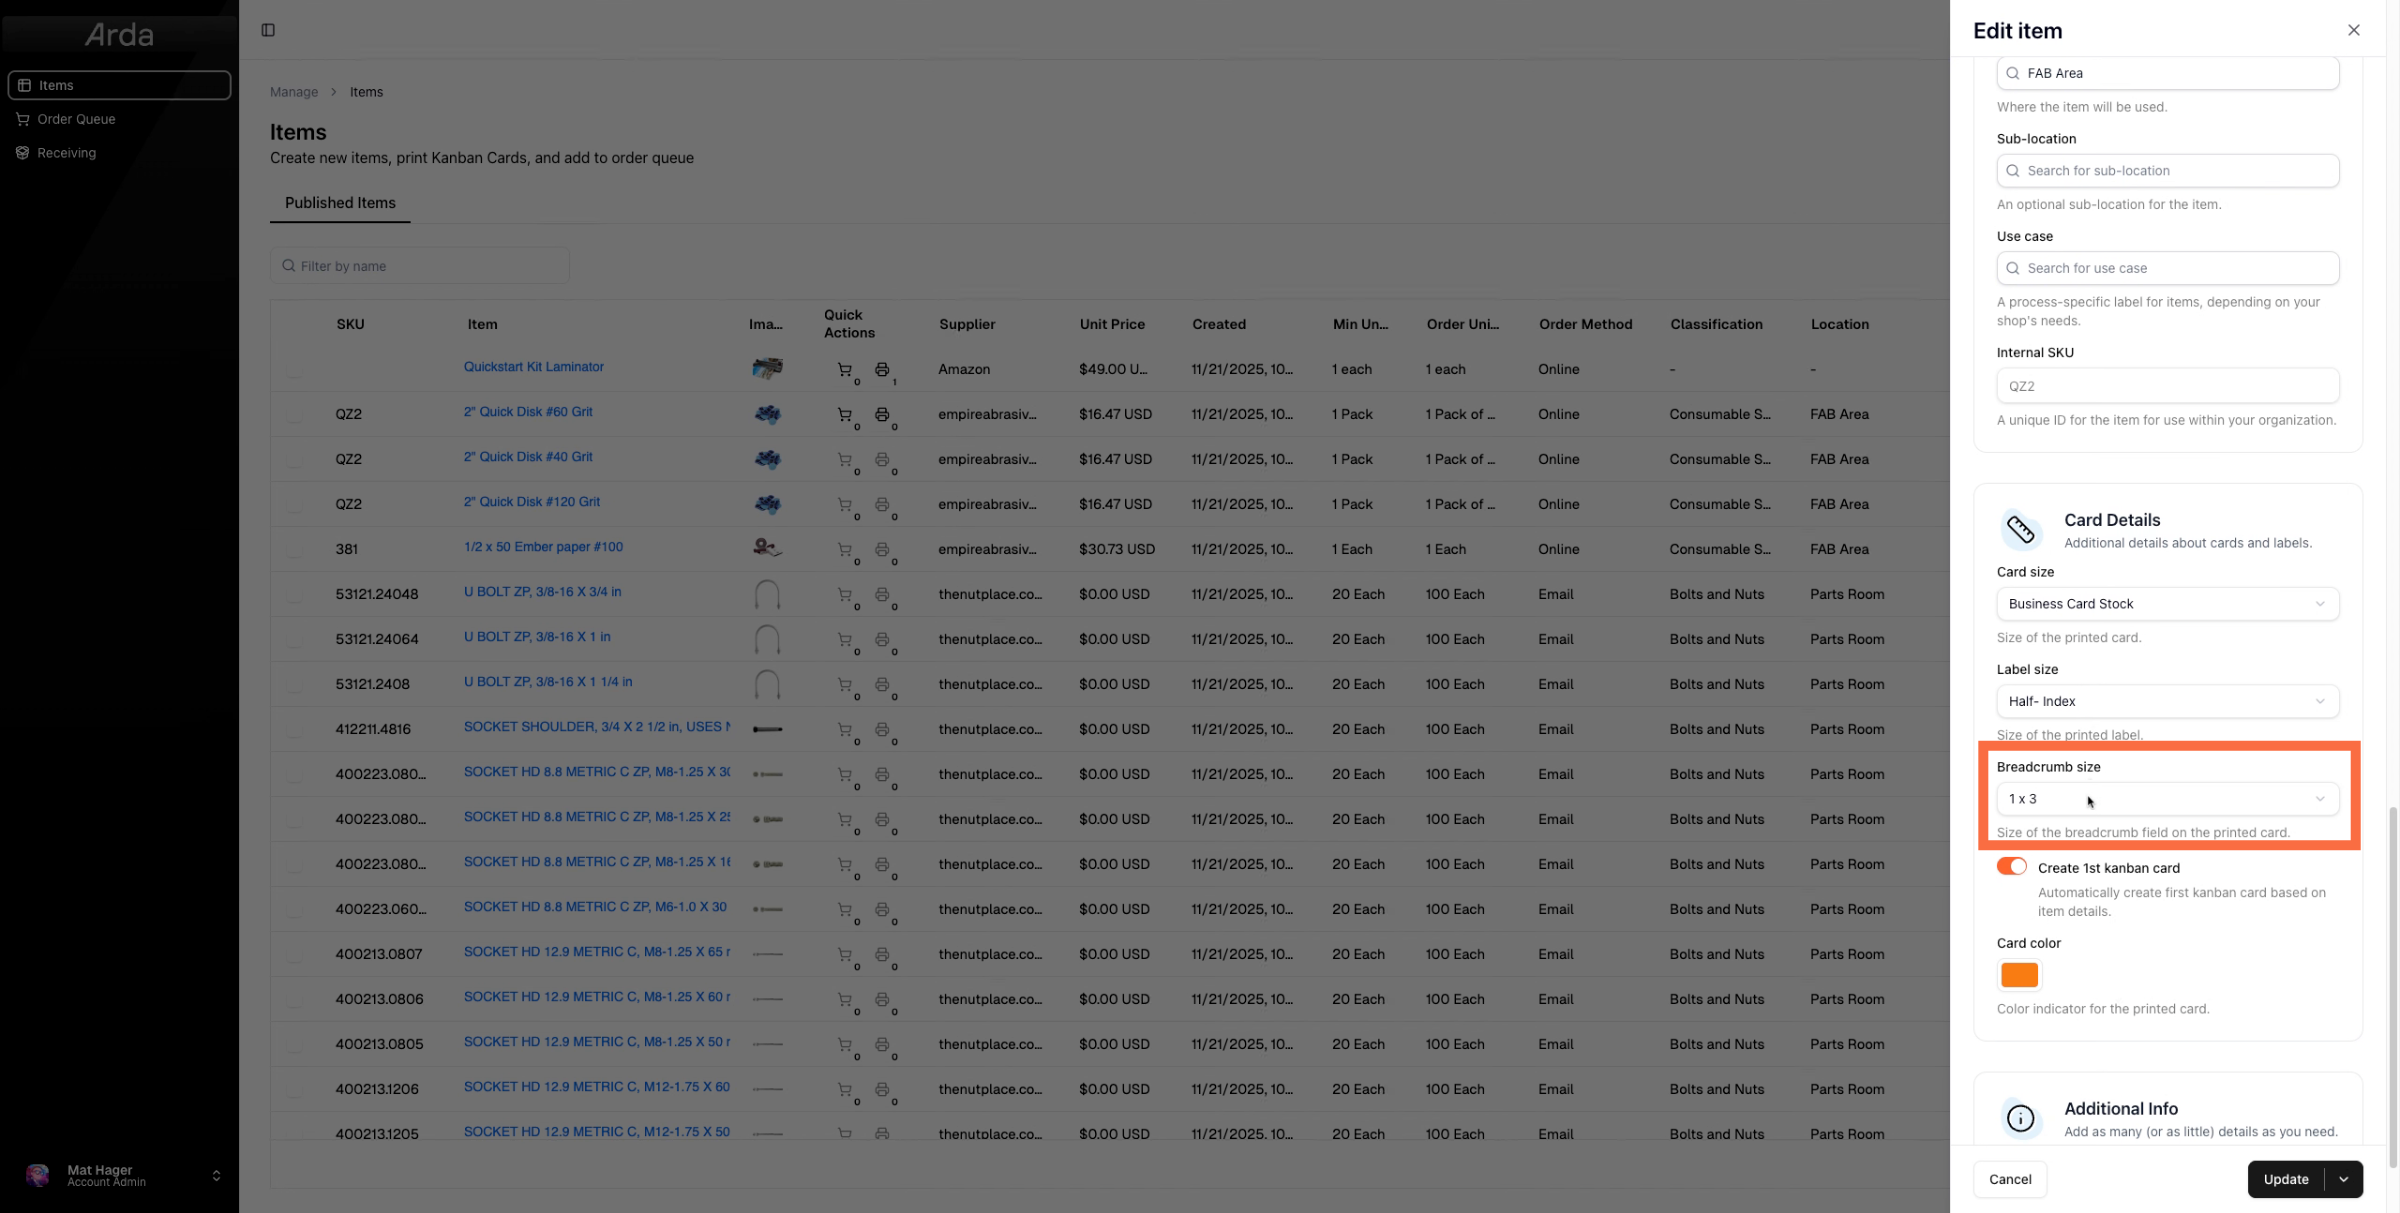
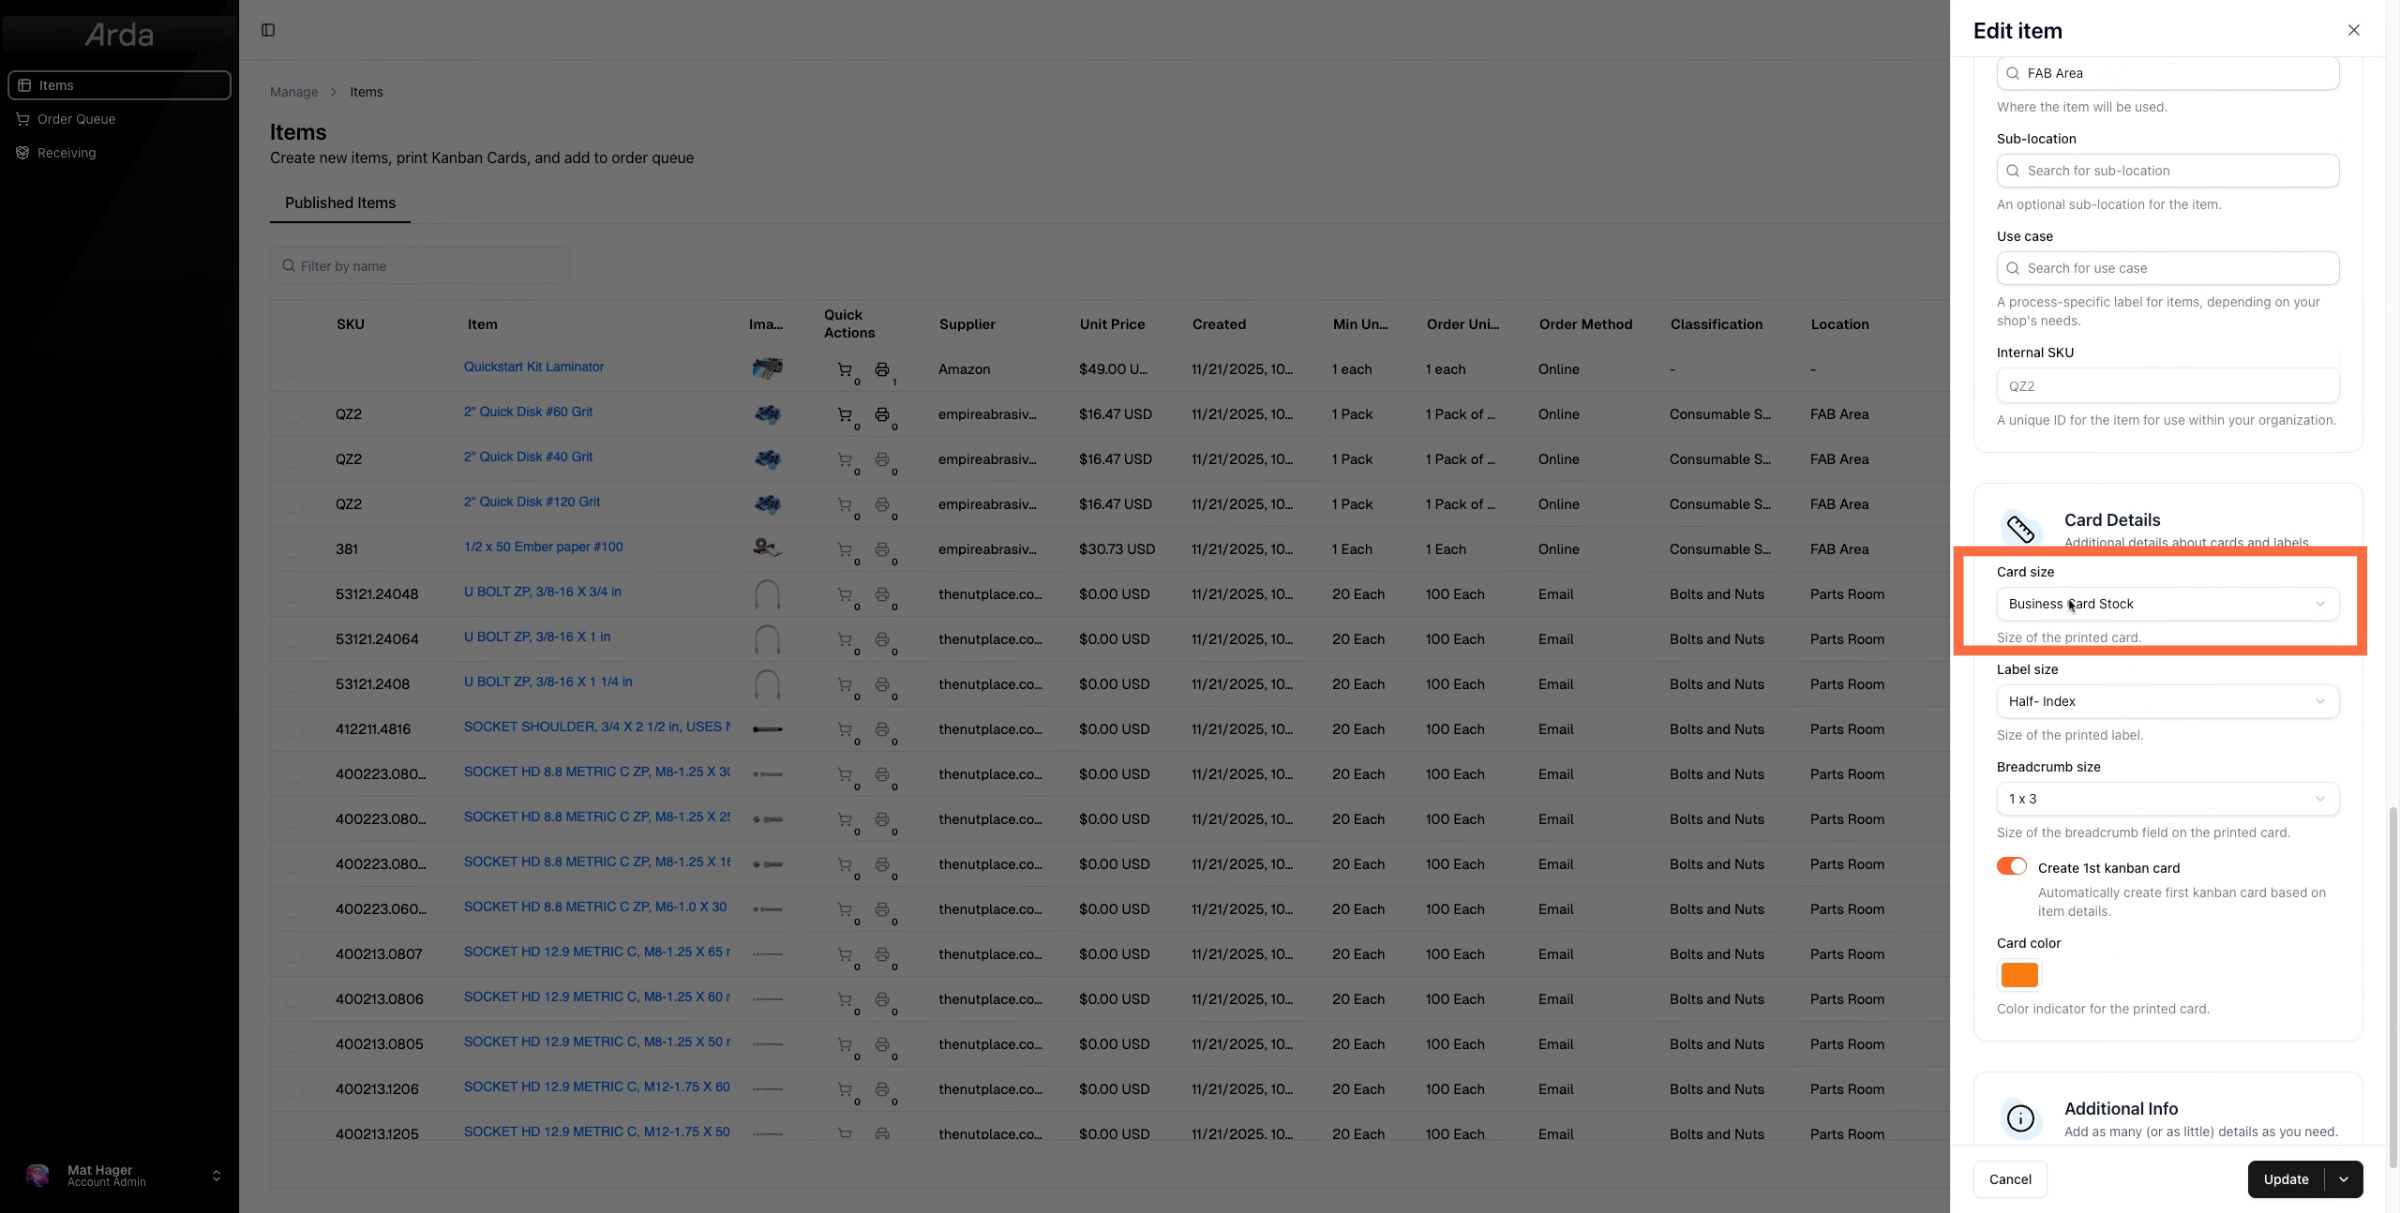
10. Note Template Variations
In each template type, you'll see different card, label, or breadcrumb sizes available.

11. Select Card Size For Printing
Let's go ahead and initially print to a 3 by 5 card. I'm going to update that card size. If I wanted to print a label or breadcrumb I can change those at this time too.

12. Update to save
Make sure to press update to save your changes
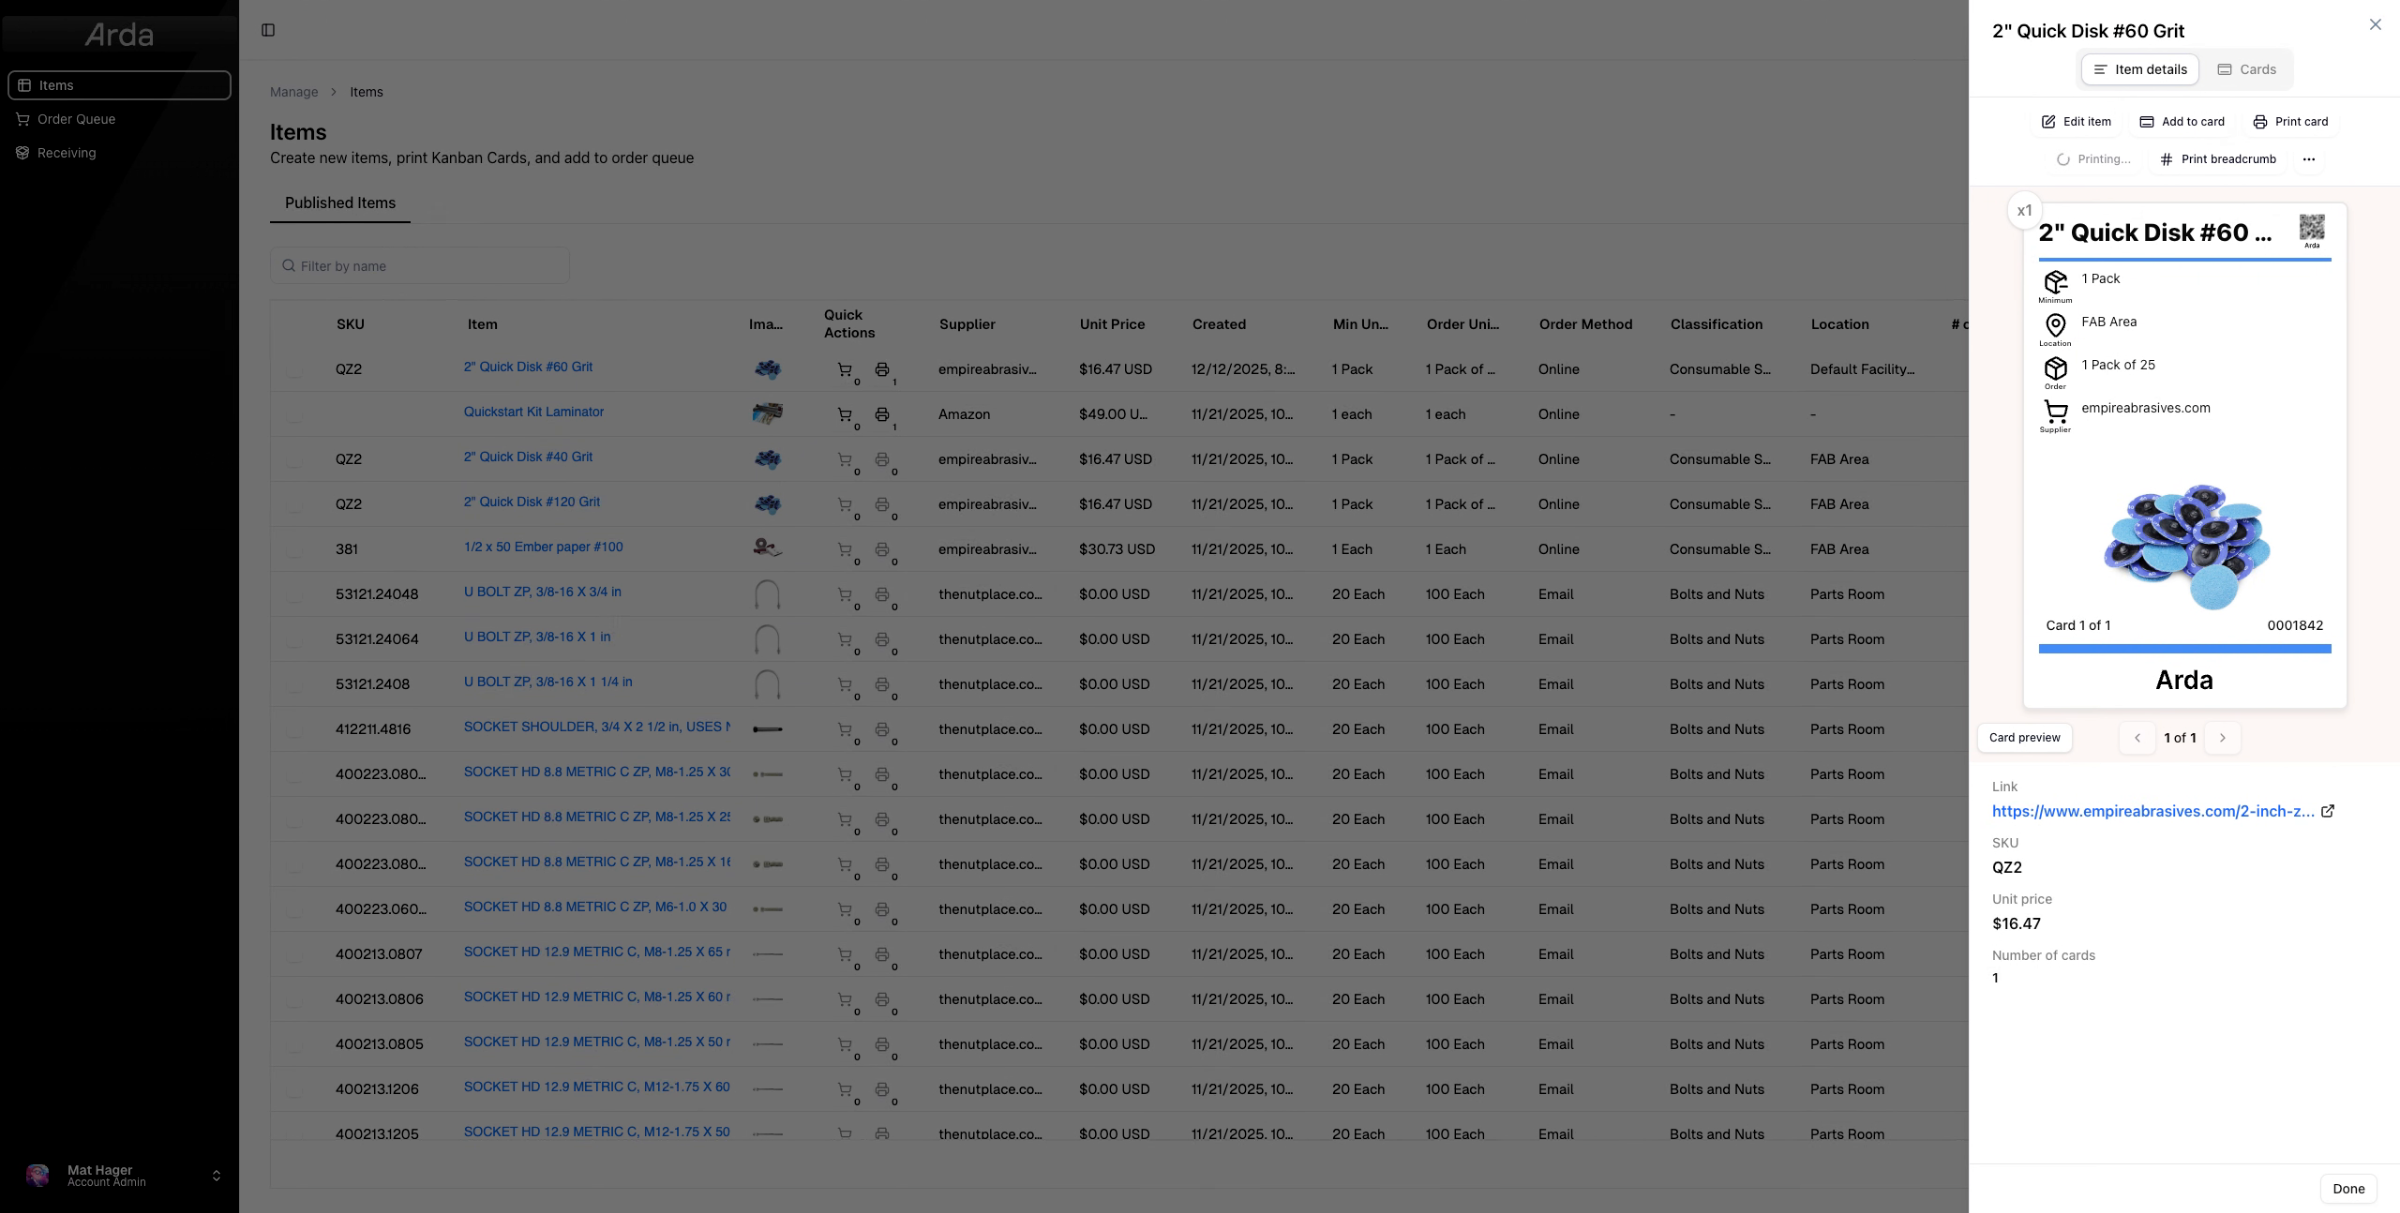
13. Print Using Quick Action Icon
There are a couple different ways to print. One is to press the print icon here.
14. View Printed Card
That will trigger the creation of a PDF document with your card. This will pop up in another tab. If you don't see it, make sure pop-up blockers are not preventing the tab from opening.
15. Print From Item Options
Alternatively, if I'm within the item, I can go to print card, print label, or print breadcrumb and print any of those.
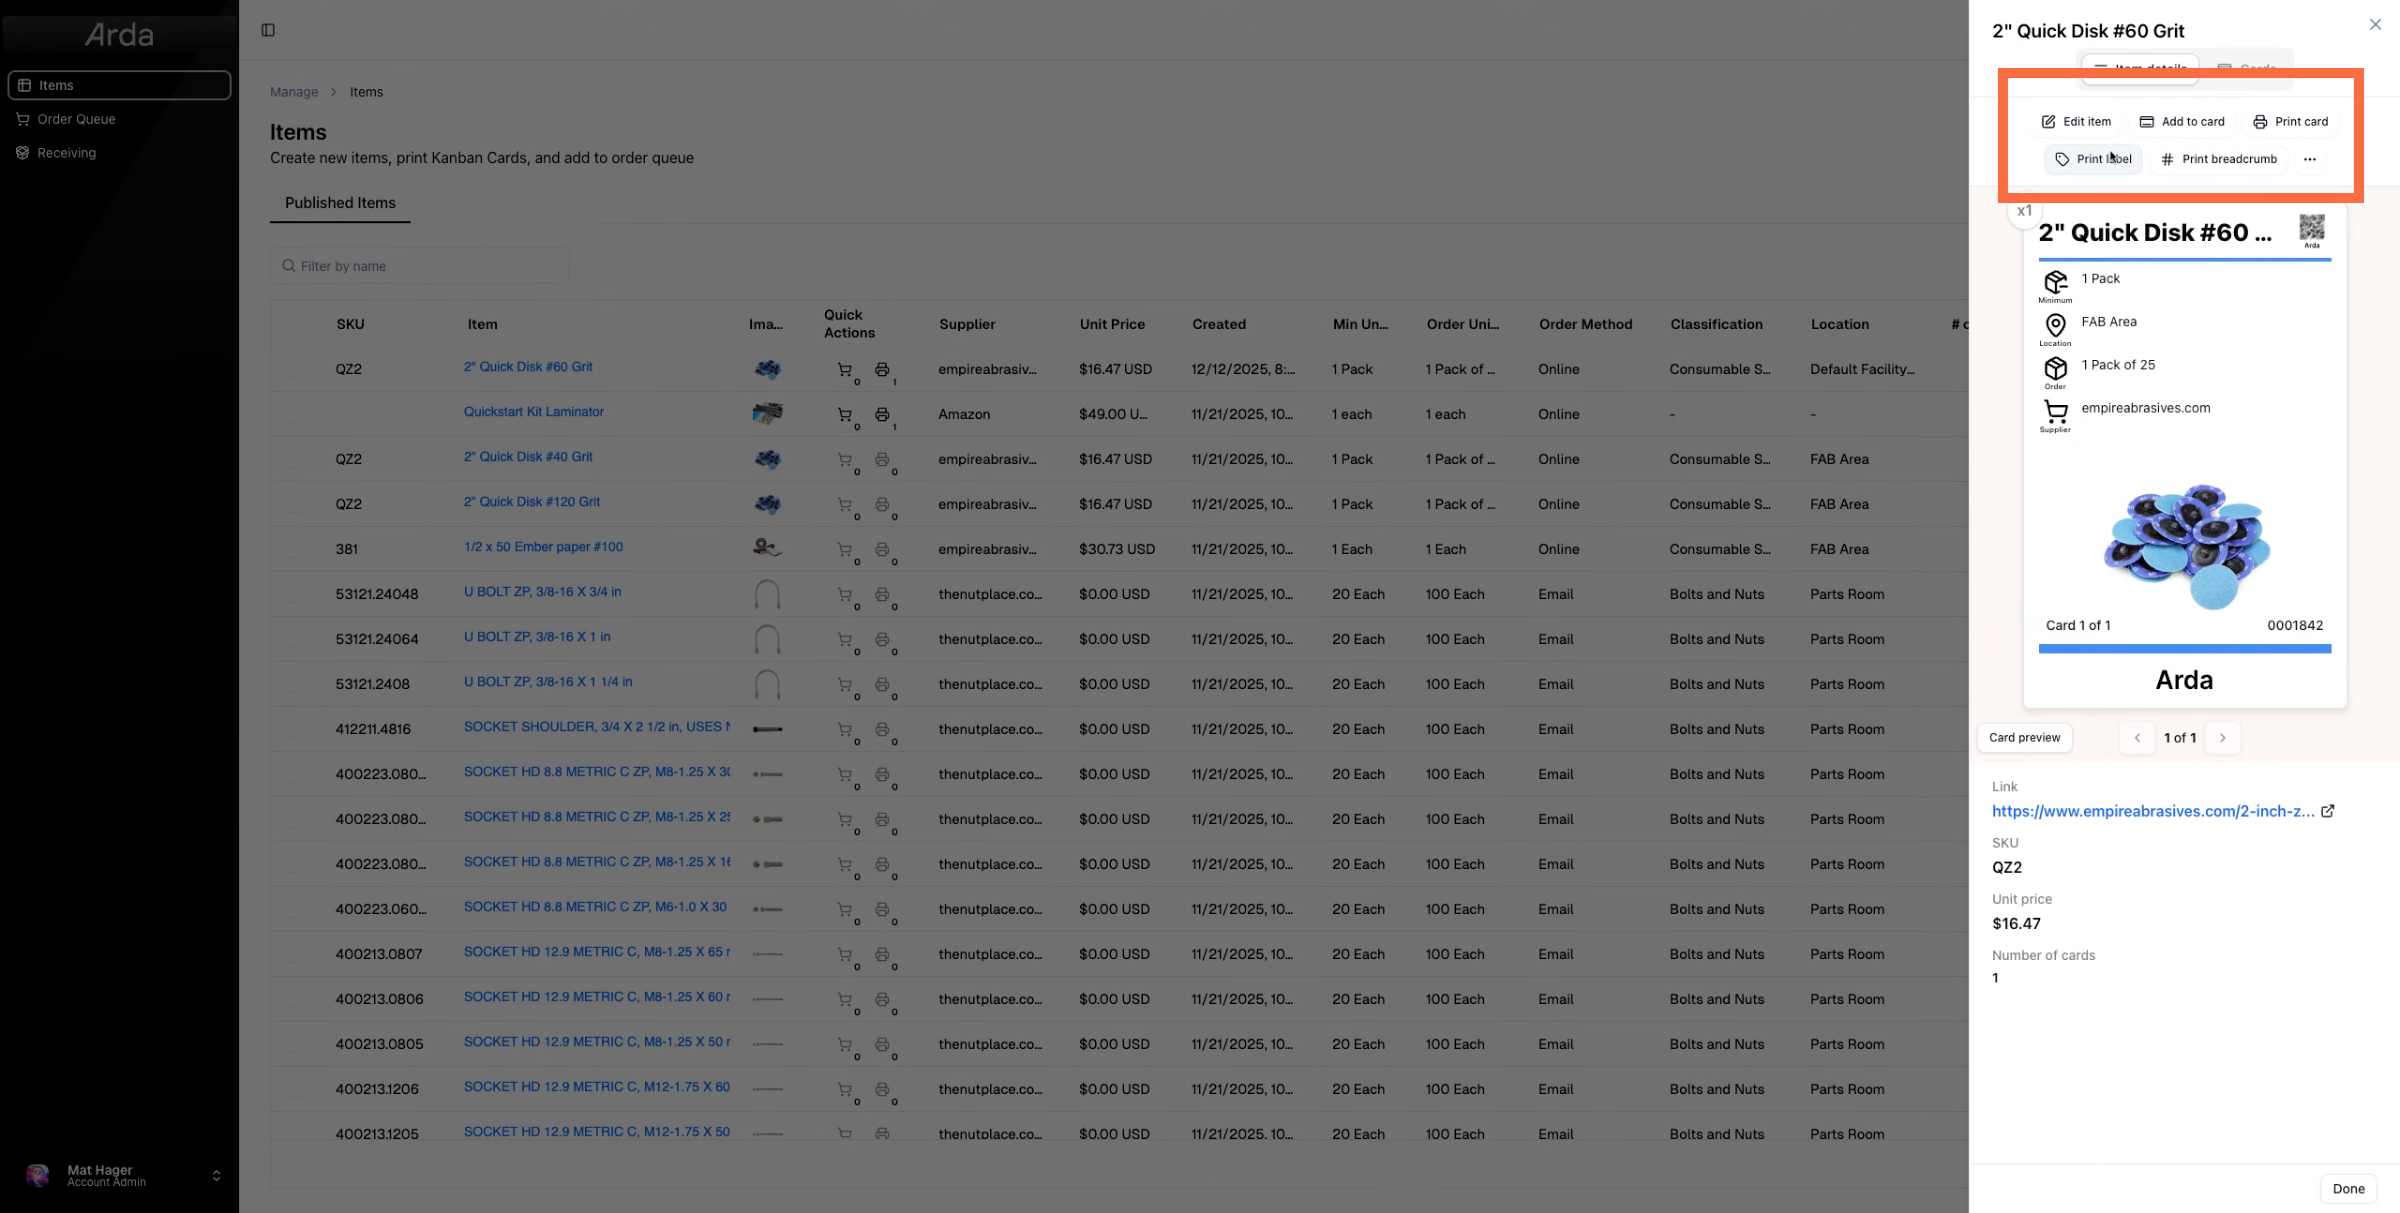
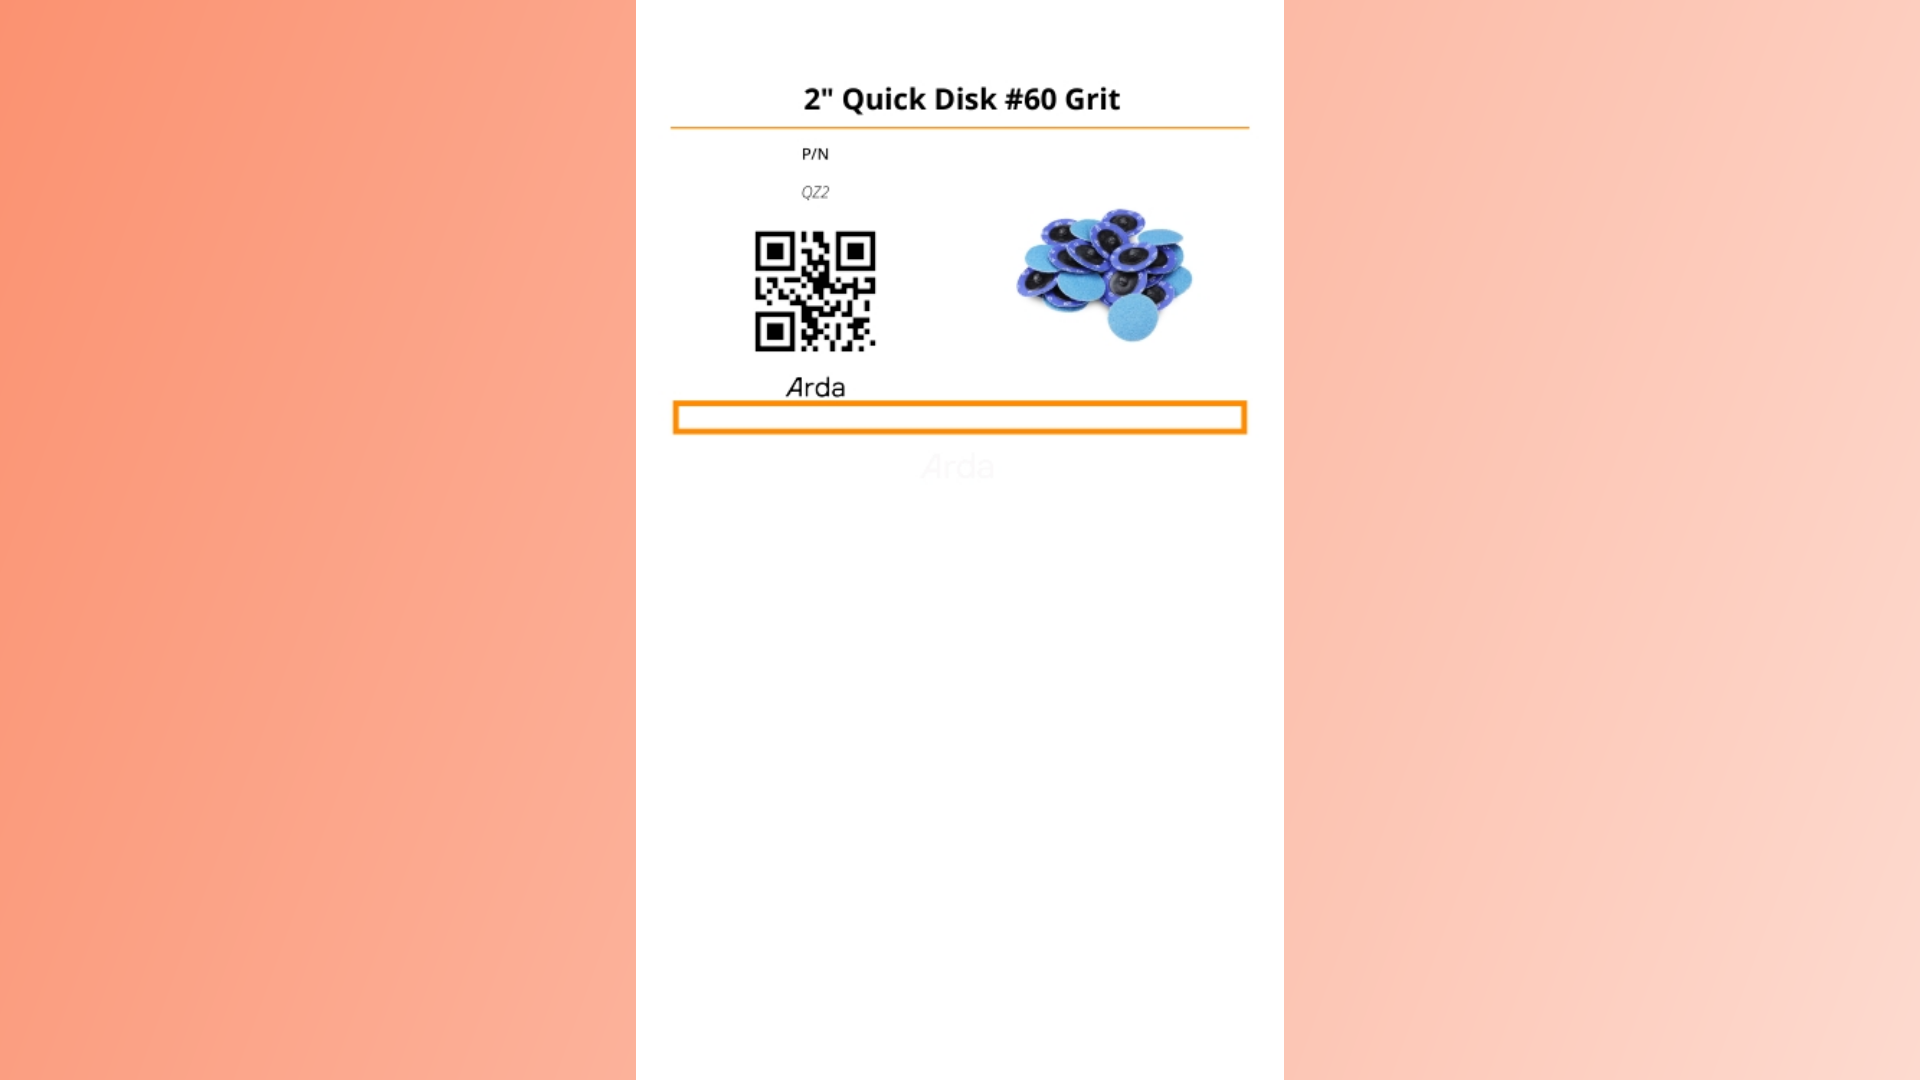
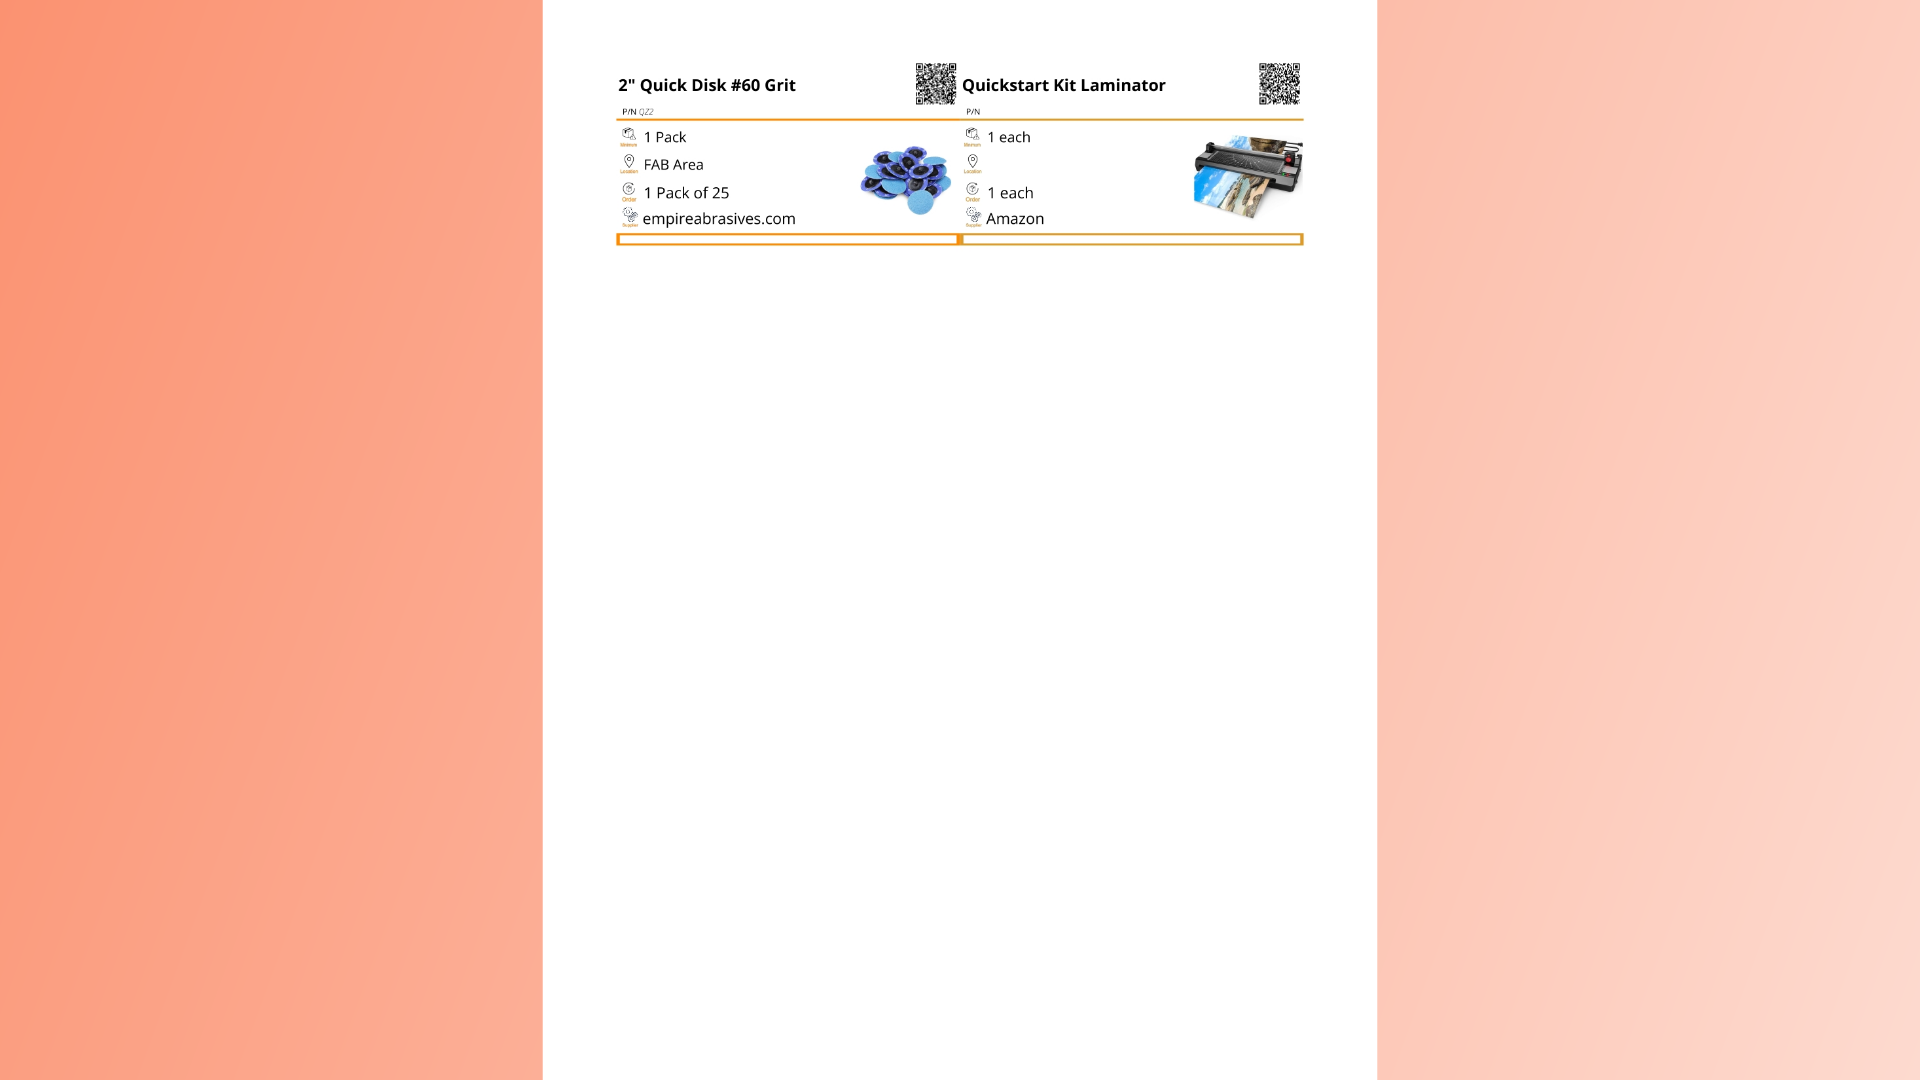
16. 3x5 Card
Here is what the 3x5 card will look like.
17. Print Label
Let's go ahead and print that label.
18. Print Label Example
19. Example Half Index Card Label
That just printed a half index card with that label.
20. Prepare For Bulk Printing
Now let's talk about bulk printing. Select the items you'd like to print.To bulk print all items must be the same card, label, or breadcrumb template. For this example I've changed them to business card stock using the steps highlighted above.

21. Initiate Bulk Print
Initiate bulk printing by going to actions and selecting print cards, labels, or breadcrumbs as appropriate
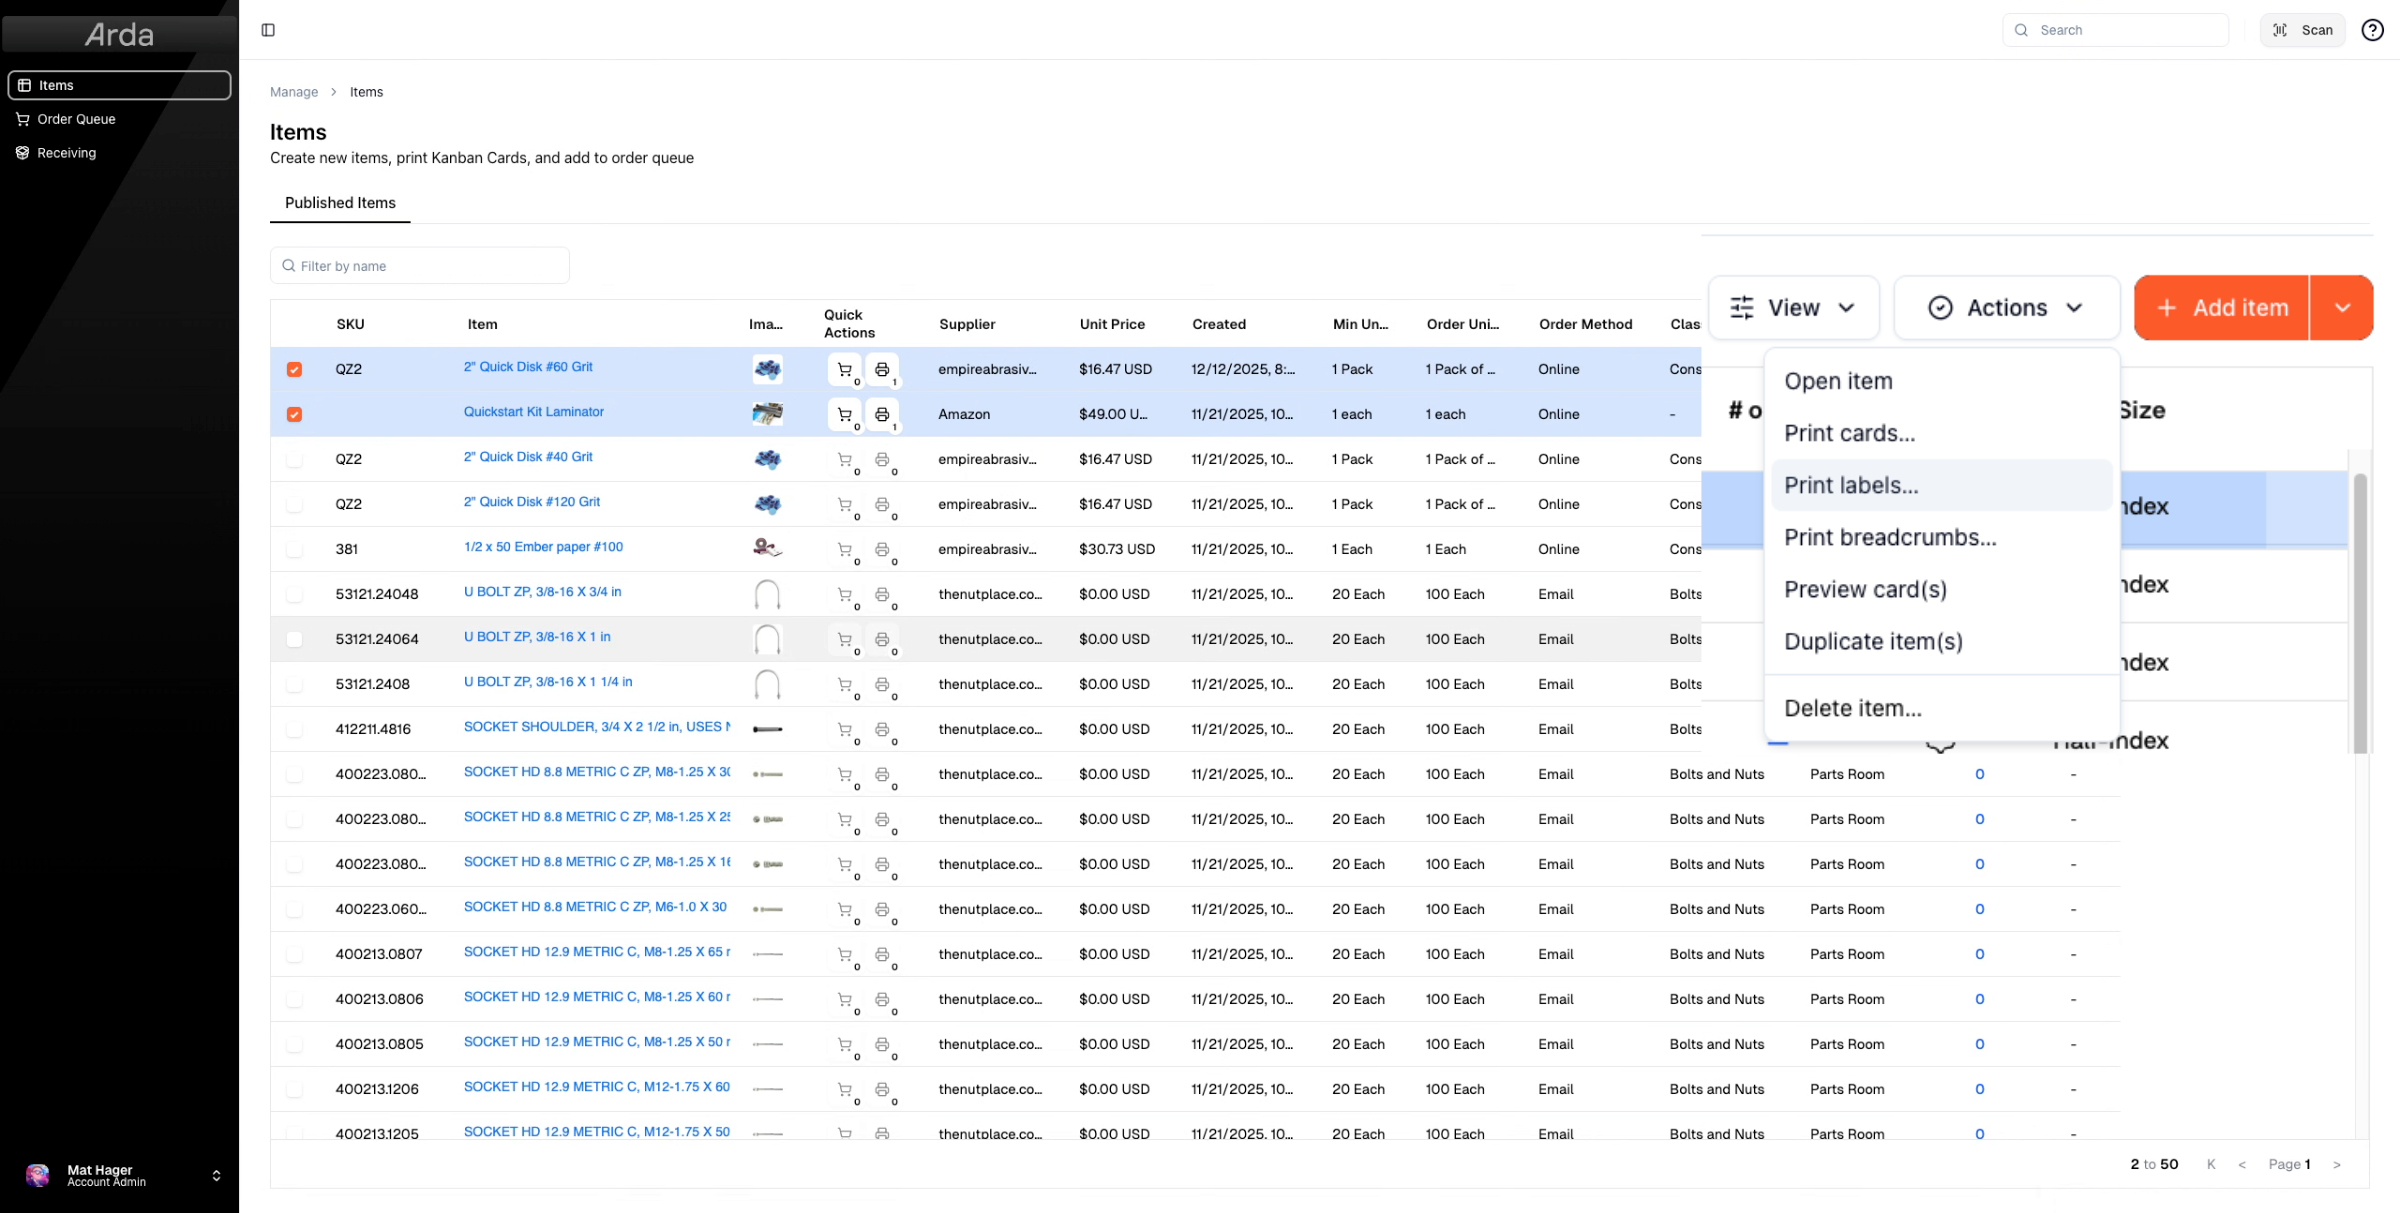
22. Example Business Card Stock Kanban cards
As you can see, we've now printed both cards.
23. Explain Bulk Print Output
These printouts are sent to your 8.5 by 11 letter paper tray with Avery templates and output onto business cards.
This guide covered printing individual and bulk cards, labels, and breadcrumbs, explaining templates, sizes, and printing methods. For further assistance, contact Arta support or customer success.